

Open the settings
- Open One-Click Experiences in the Partner Portal.
- Find AI Receptionist.
- Select Settings.
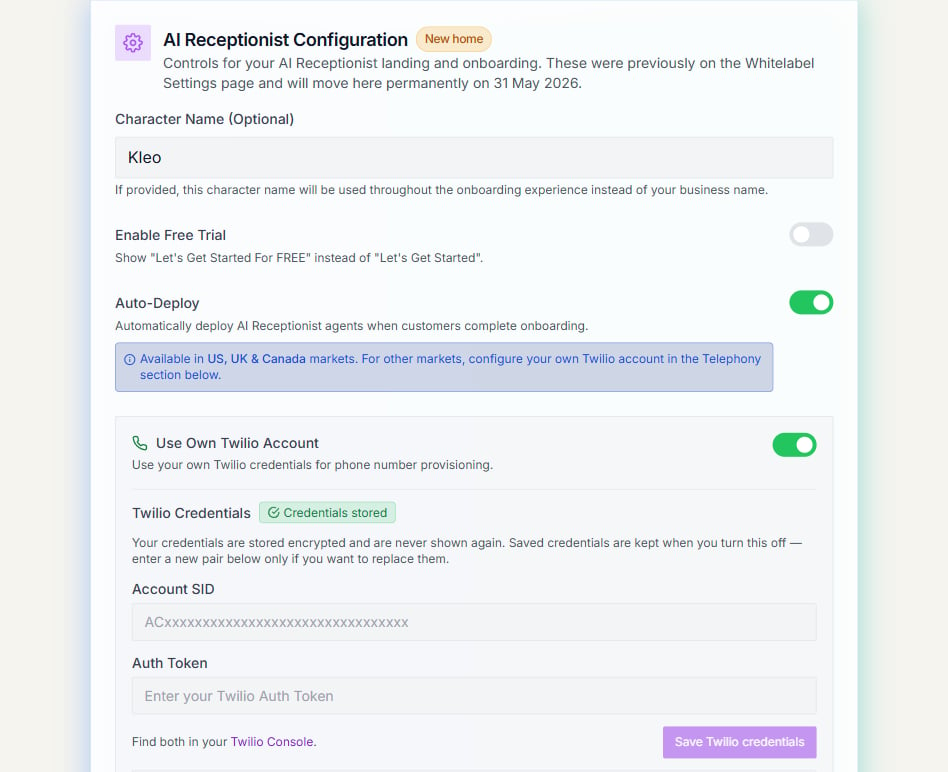
Choose the customer experience
Use AI Receptionist Configuration to set the main customer options:- Character Name changes the name used during onboarding.
- Enable Free Trial changes the main signup action to a free-trial offer.
- Auto-Deploy starts agent setup after a customer completes onboarding.
- Free AI Credits for New Customers sets the starting credit amount for new signups.
Choose an agent tier
The page currently offers Essentials, Moderate, Premium, and Bring Your Own Agent. Each option shows its credit rate and a short capability summary. Review the rate shown in the portal before saving because availability and pricing can change.Use your own phone provider account
Turn on Use Own Twilio Account if you want to use your own Twilio credentials for phone number setup. Enter the Account SID and Auth Token, then select Save Twilio credentials. Saved credentials are not displayed again. Enter a new pair only when you want to replace them.Set pricing and business lookup limits
Choose the pricing model shown to customers:- Subscription
- Pay-as-you-go
- Fixed price