What Email Settings is for
Email Settings controls how your portal sends white-label emails (invites, notifications, and system messages). You typically choose one of two options:- Custom SMTP Server (bring your own mail server)
- Domain Email Service (one-click setup to send from your domain)
Where to find it
- Open Settings.
- Scroll to Email Settings.
Option A: Configure a custom SMTP server
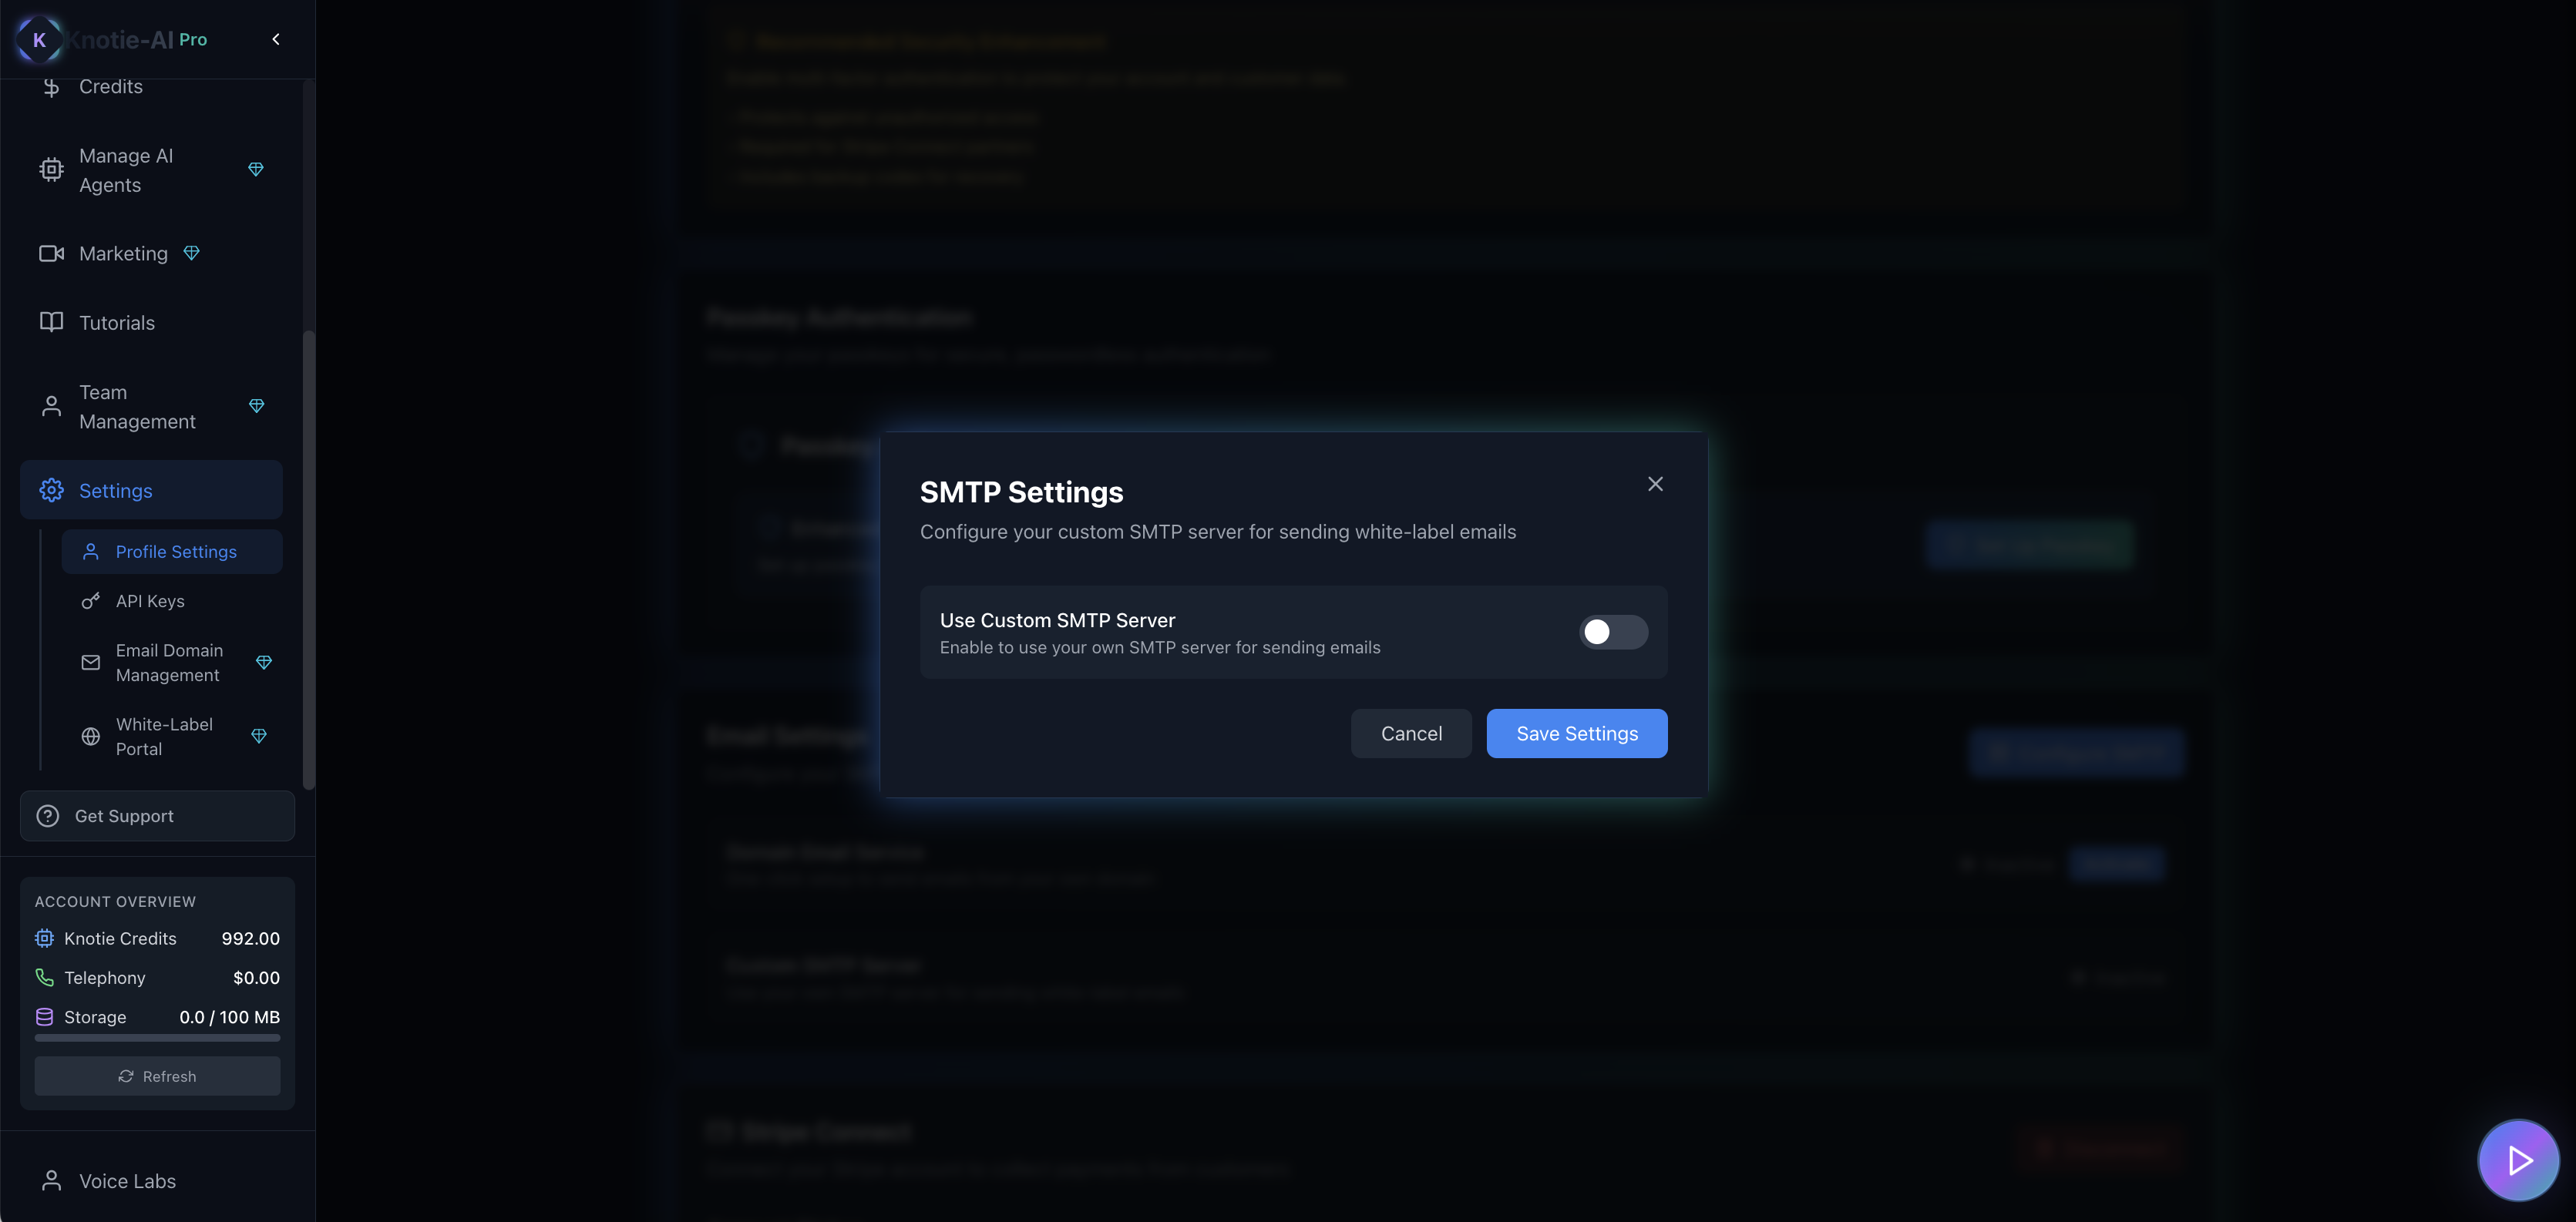
- Click Configure SMTP.
- Toggle Use Custom SMTP.
- Fill in:
- SMTP Host
- SMTP Port
- SMTP Username
- SMTP Password
- From Email
- From Name
- Acknowledge the risk checkbox (required).
- Click Test Connection (recommended).
- Save.
- If you already have a saved password, you may not need to re-enter it unless you’re changing it.
- Test Connection sends a check to your SMTP server so you can confirm the details work before saving.
SMTP security and vulnerabilities
When using custom SMTP, be aware of potential security considerations:- Credential exposure – SMTP credentials are stored in the database. Use a dedicated email account with limited permissions.
- Connection security – Always use TLS/SSL (port 465 or 587) to encrypt the connection.
- Rate limiting – Some SMTP providers have rate limits. Monitor your sending volume.
- SPF/DKIM/DMARC – Configure these DNS records to improve deliverability and prevent spoofing.

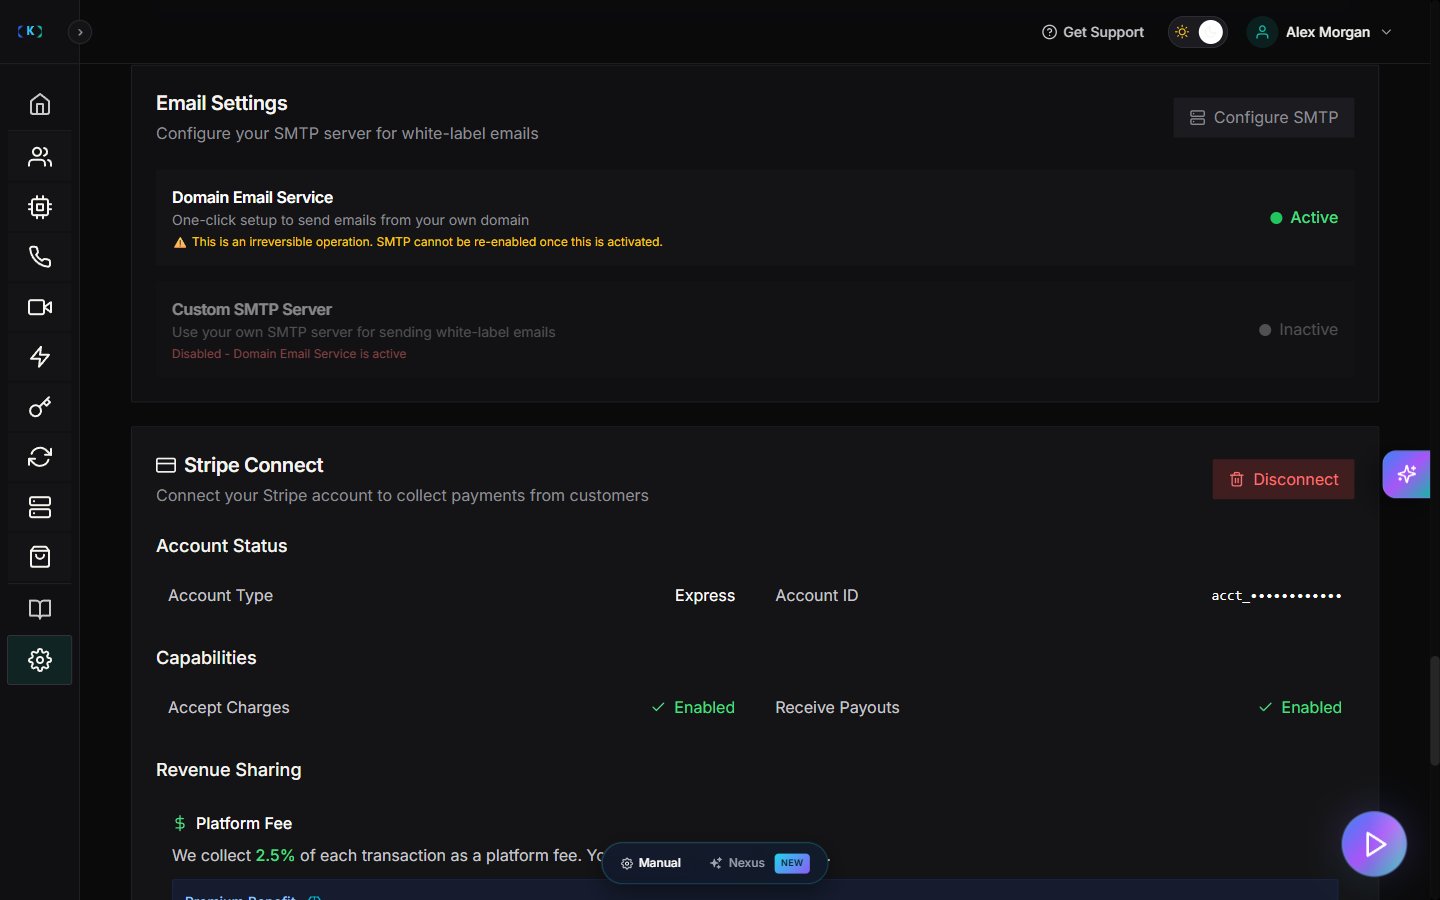
Option B: Enable Domain Email Service (irreversible)
The Settings page includes a Domain Email Service block with an Activate button. Important:- The UI warns this is irreversible.
- Once enabled, SMTP cannot be re-enabled.
/partner/settings/email-domain
Post-activation state
After Domain Email Service is activated, the UI changes significantly:- Configure SMTP button becomes disabled with text: “Inactive — Disabled - Domain Email Service is active”
- The Activate button is replaced with an Active status badge
- The Domain Email Service block shows an irreversibility warning
This page describes the first-time setup experience. If your account already has Domain Email Service active, the main buttons will be disabled or hidden.
Troubleshooting
- Configure SMTP is disabled
- Domain Email Service is active.
- SMTP test fails
- Confirm host/port.
- Confirm username/password.
- Confirm your SMTP provider allows the sender address.
Screenshots