What Auto-Deploy is for
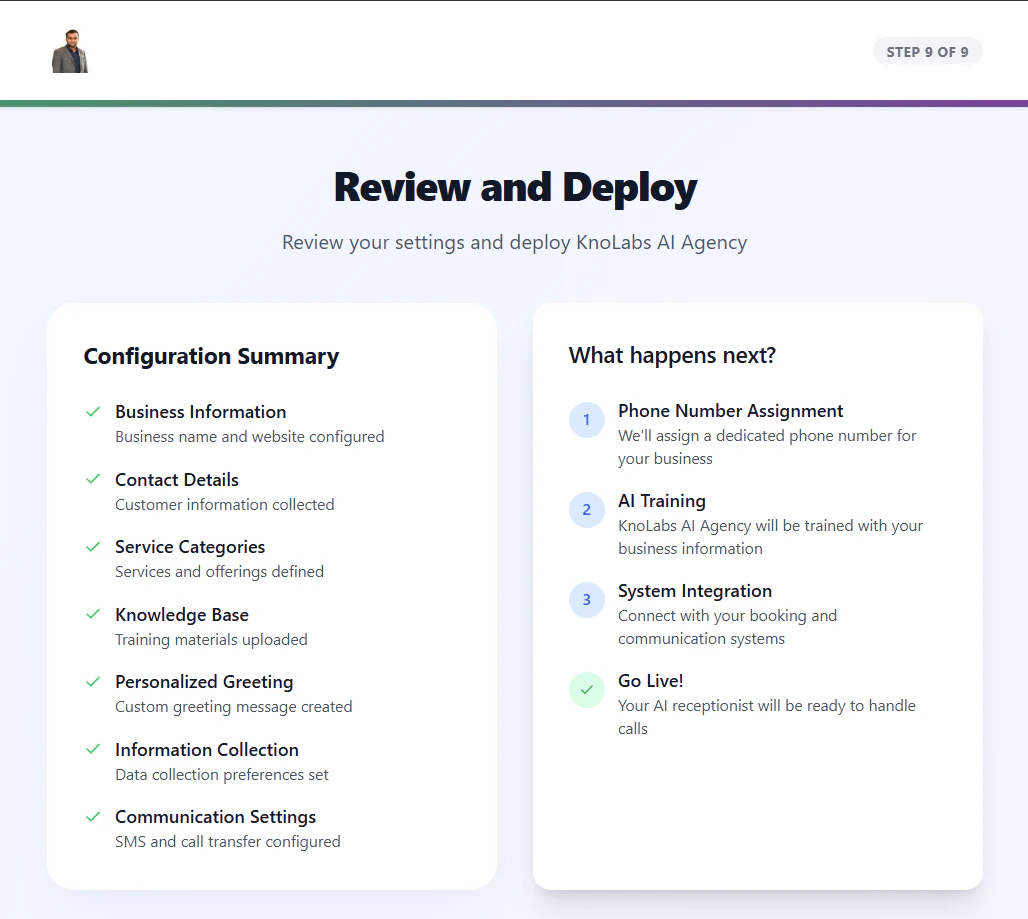
Auto-Deploy automatically activates AI agents for customers who complete payment and click Deploy on Step 9 (Summary & Deploy) of the SaaS onboarding process. It removes the manual setup work and gives self-service customers instant activation.The onboarding flow is 9 steps. Step 9 — Summary & Deploy — is where payment is confirmed and the customer clicks Deploy.
- Running a SaaS portal with self-service onboarding
- You want customers to get instant access after signup (and payment, if applicable)
- You have sufficient credits to cover deployments
How auto-deploy works
The deployment flow
- Customer completes Step 9 (Summary & Deploy) – Their payment goes through (or is skipped for free / pay-as-you-go portals)
- Deploy button unlocks – Once payment is confirmed as active; otherwise the customer stays on Step 9 with an error
- Customer clicks Deploy – This kicks off the setup
- Prerequisites are checked – Credits and configuration are validated
- Deployment is queued – The job joins the setup queue
- Agent is deployed – The AI Receptionist is activated automatically
- Everyone’s notified – The customer gets a setup email, and you get a deployment notification
Deployment statuses
A customer’s deployment can be in one of these states:- Not started – Onboarding isn’t complete yet
- Queued – The deployment is in the queue
- Pending credits – Waiting for enough credits
- Agent ready – The agent is deployed but still needs a phone number
- Completed – Fully deployed and working
- Failed – Something went wrong during deployment
Prerequisites for auto-deploy
1. SaaS Portal Mode enabled
Auto-deploy requires SaaS mode:- Go to Settings → Whitelabel.
- Select SaaS Portal mode.
- Enable SaaS Onboarding.
2. Sufficient credit balance
Your partner account needs minimum credits: Free Forever partners:- 1000 cents ($10) Telephony Credits
- 200 Knotie Credits
- 500 cents ($5) Telephony Credits
- 200 Knotie Credits
3. Auto-deploy enabled
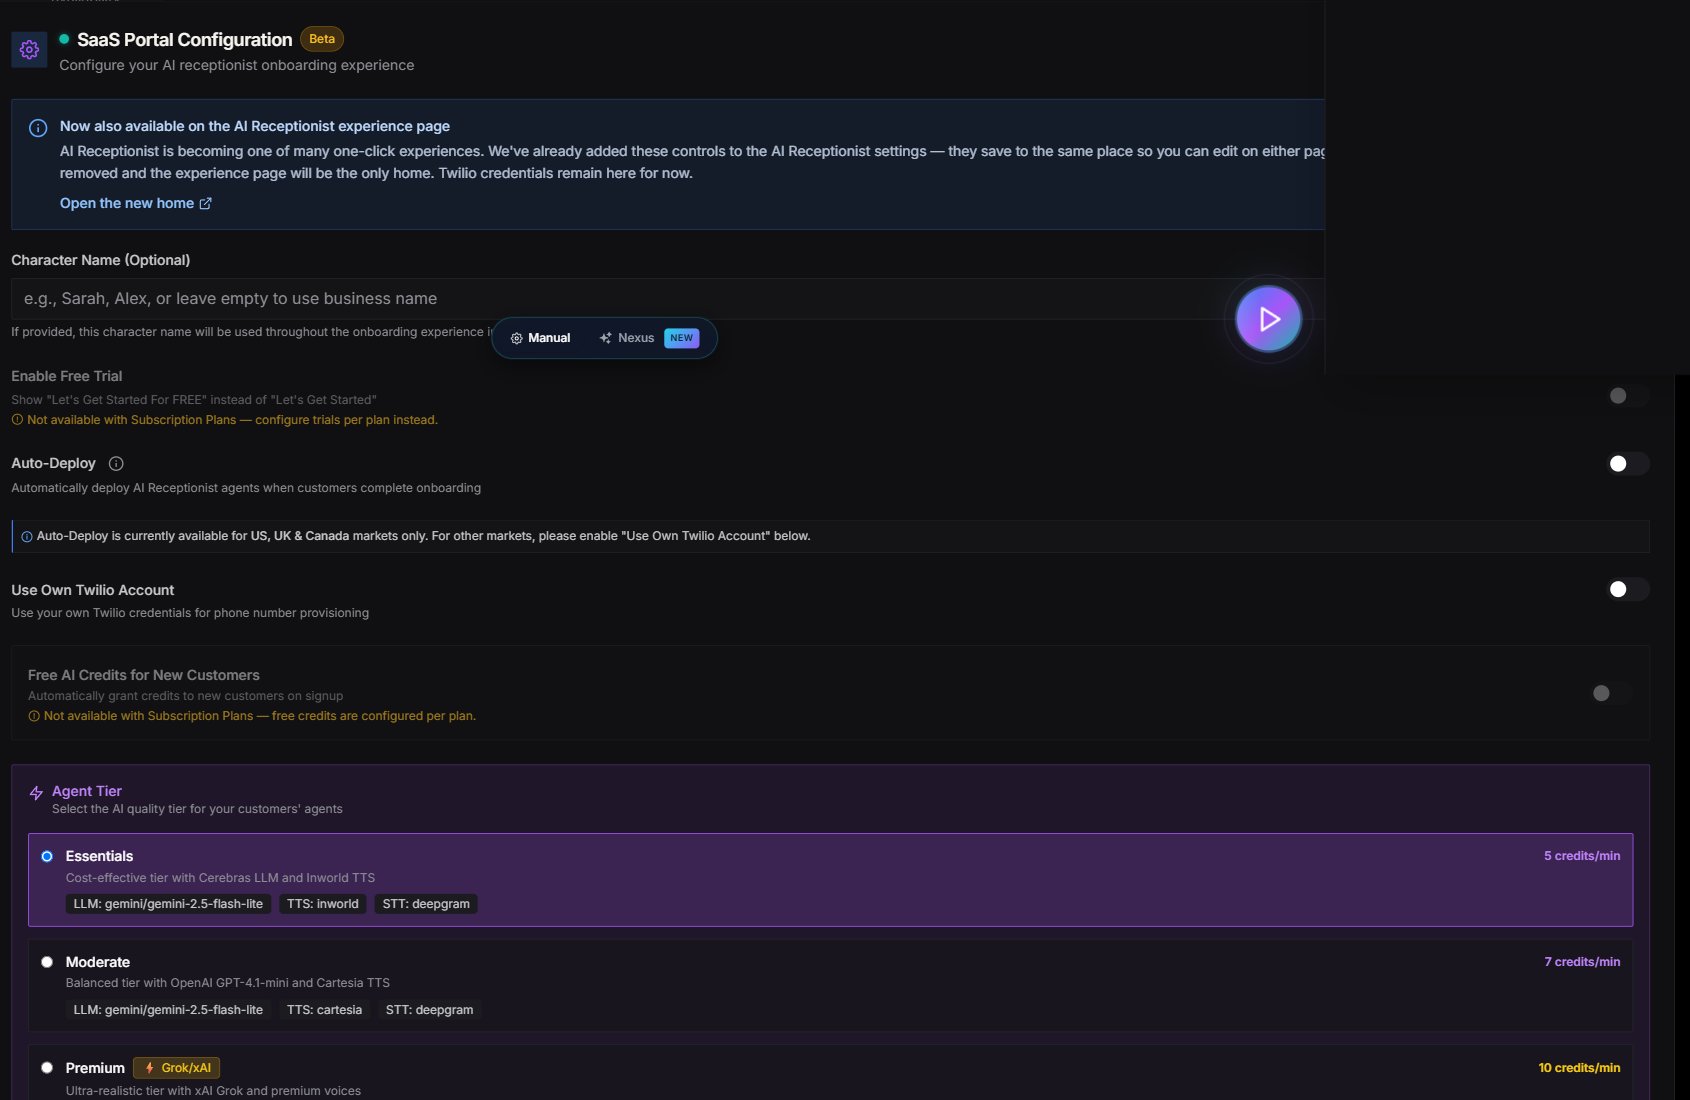
Toggle auto-deploy in whitelabel settings:- Go to Settings → Whitelabel.
- In SaaS Portal Configuration, find Auto-Deploy Enabled.
- Toggle to ON.
- Save settings.
Enable auto-deploy
Step 1: Configure SaaS settings
- Navigate to Settings → Whitelabel.
- Select SaaS Portal mode.
- Configure:
- SaaS Onboarding Enabled – Toggle ON
- Free AI Credits – Set initial credits (e.g., 50)
- SaaS Agent Tier – Choose agent capability level
Step 2: Enable auto-deploy
- In the SaaS Portal Configuration section.
- Find Auto-Deploy Enabled toggle.
- Set to ON.
- Click Save Settings.
Step 3: Ensure credit availability
- Check your credit balance in Credits page.
- Top up if below minimum thresholds.
- Set up low-credit alerts to avoid deployment failures.
What happens during auto-deploy
Phase 1: Customer completes onboarding
When a customer reaches Step 9 (Summary & Deploy) and clicks Deploy:- The system first confirms their payment is active; if not, they stay on Step 9 with an error message.
- Their onboarding details (business info, knowledge base, greeting, voice, integrations, billing model) are checked and saved.
- AI credits are turned on for the customer (only if Free AI Credits is set to more than 0).
- The deployment status is set.
Phase 2: Credit validation
The system checks your credit balance: If you have enough credits:- Status → Queued
- The setup job starts
- Status → Pending credits
- You get an email letting you know
- The customer can still sign in, but their agent stays inactive
Phase 3: Deployment
The setup runs automatically:- Agent creation – A Knova AI Receptionist is created, personalized with the customer’s business profile, knowledge base, and onboarding details
- Knowledge base setup – The customer’s uploaded documents are processed and added
- Phone number setup – A phone number is purchased and connected so the agent can take calls
- Integrations – Tools (email, SMS, calendar) and analytics are turned on
- Final check – The system confirms everything is in place
Phase 4: Completion
On success:- Status → Completed
- The customer can make and receive calls
- A confirmation email is sent
- Status → Failed
- The error is logged for review
- Support is notified
Monitor deployment status
In Customer List
View deployment status for each customer:- Go to Customers → Active Customers in the Partner Portal sidebar.
- Each customer shows a status badge:
- Queued – Deployment in progress (spinning icon)
- Pending Credits – Waiting for credits (amber)
- Agent Ready – Deployed successfully (green)
- Completed – Fully operational (green)
- Failed – Deployment error (red)
Continue deployment manually
If a customer is stuck on Pending credits, you can resume deployment:- Top up your credits.
- Find the customer in Customers → Active Customers.
- Click Continue Deployment button.
- System re-queues the deployment job.
Deployment notifications
Insufficient credits notification
When auto-deploy fails due to insufficient credits, you receive an email: Subject: ⚠️ Auto-Deployment Pending - Credits Required - [Customer Name] Contains:- Customer details
- Current credit balance
- Minimum required credits
- Link to top up credits
Deployment failure notification
If deployment fails for other reasons, support receives notification with:- Customer information
- Error details
- Troubleshooting steps
Credit requirements explained
Why minimum credits are required
Auto-deploy requires upfront credits to ensure:- Agent can be activated without interruption
- Customer has immediate access to services
- No failed deployments due to insufficient funds
How credits are consumed
During auto-deploy:- Telephony Credits – Phone number provisioning, call routing setup
- Knotie Credits – AI agent processing, knowledge base embedding, tool initialization
- Agent tier selected
- Knowledge base size
- Number of integrations
- Tool complexity
Free AI Credits for customers
Customers receive Free AI Credits (configured in SaaS settings):- These are separate from your partner credits
- Used for initial testing and onboarding calls
- Configurable per partner (default: 50 credits)
Troubleshooting
Auto-deploy not triggering
Possible causes:- Auto-Deploy toggle is OFF
- SaaS Onboarding not enabled
- Customer didn’t reach Step 9 (Summary & Deploy) — still stuck on a previous step (most commonly the payment verification within Step 9)
- Partner credits below minimum threshold
- Verify auto-deploy is enabled in Settings → White-Label Portal.
- Check customer reached Step 9 (Summary & Deploy) in Prospects list — earlier step completion means payment didn’t clear.
- Confirm credit balance meets minimums.
Deployment stuck in “Queued”
Possible causes:- A backlog in the setup queue
- Network issues
- Configuration errors
- Wait 5-10 minutes for queue processing.
- Check deployment status in Customers → Active Customers.
- Contact support if stuck for >30 minutes.
Deployment failed
Possible causes:- Invalid customer data
- Missing required integrations
- Agent configuration errors
- Knowledge base processing failure
- Review customer’s onboarding data for completeness.
- Check error message in deployment logs.
- Manually configure missing elements.
- Retry deployment from Customers → Active Customers.
Credits deducted but agent not deployed
Possible causes:- Deployment job failed mid-process
- Credits consumed for partial setup
- Check Customers → Active Customers for deployment status.
- Review credit history for transaction details.
- Manually complete deployment if needed.
- Contact support for credit refund if applicable.
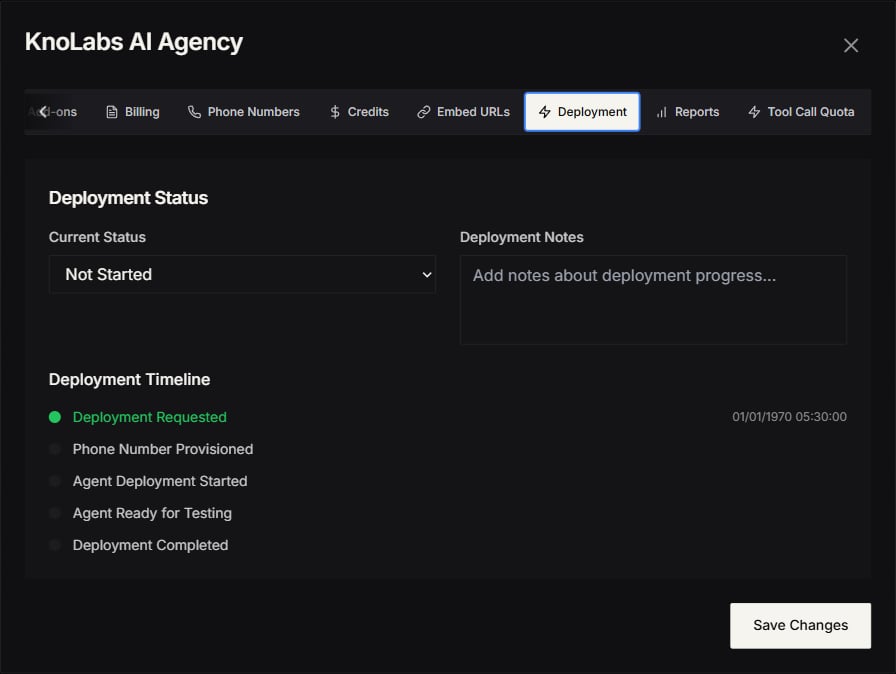
Manual deployment fallback
If auto-deploy is disabled or fails, you can deploy manually:- Go to Customers → Active Customers in the Partner Portal sidebar.
- Select the customer.
- Click Manage.
- Go to Deployment tab.
- Configure agent settings manually.
- Click Deploy Agent.
Best practices
Credit management
- Maintain buffer – Keep 5-10x minimum credits for multiple deployments
- Set up alerts – Configure low-credit notifications
- Monitor consumption – Track credit usage per deployment
- Automate top-ups – Use recurring payments for credit purchases
Deployment monitoring
- Check daily – Review pending deployments each morning
- Follow up quickly – Address Pending credits status within hours
- Track success rate – Monitor deployment success vs failure ratio
- Optimize onboarding – Reduce friction points causing deployment failures
Customer experience
- Set expectations – Inform customers deployment may take 5-10 minutes
- Provide generous free credits – Allow thorough testing before purchase
- Send confirmation emails – Notify when deployment completes
- Offer support – Be available for questions during initial setup
Auto-deploy vs manual deployment
| Feature | Auto-Deploy | Manual Deployment |
|---|---|---|
| Speed | Instant (5-10 min) | Requires partner action |
| Scalability | Handles unlimited customers | Limited by partner availability |
| Customization | Uses templates | Full control |
| Credit requirement | Upfront minimums | Per-deployment |
| Best for | SaaS/self-service | Custom/enterprise customers |
Related pages
- Knova AI Receptionist agent – What gets deployed and how to configure it
- SaaS Portal Mode – Configure SaaS mode
- Prospects – Track onboarding progress
- Credits Management – Top up credits
- Deployment Status Tracking – Monitor deployments