

What JARVIS AI OS is
JARVIS AI OS is a Partner Experience that lets you sell a branded AI business assistant to your clients under any name you choose. When a prospect signs up through your landing page, the platform automatically provisions their personal AI assistant — trained on their website and documents, connected to AI tools, and accessible from a voice ORB in their customer portal. Use JARVIS AI OS when you want to:- Give prospects a hands-on demo of their own branded AI assistant at the end of a short onboarding flow
- Convert demos to paying customers with a Stripe-linked free-trial or paid tier
- Offer a voice-first AI experience without building any backend yourself
Prerequisites
Before enabling JARVIS AI OS:- Make sure your workspace has enough credits for the voice assistant.
- Confirm that voice assistants are available in your plan.
- Add phone credentials only if you want to offer customers a phone number.
Enabling the experience
- Go to Partner Portal → Experiences.
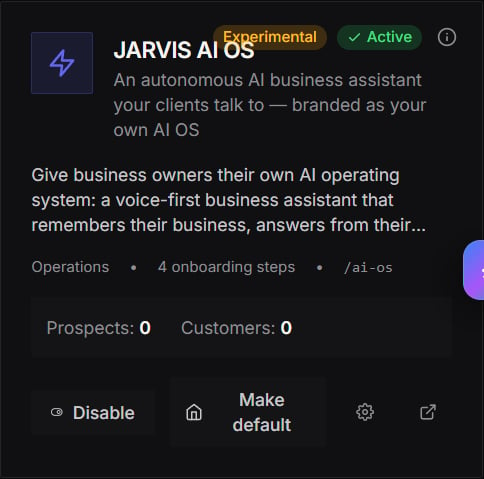
- Find the JARVIS AI OS card.
- Click Enable.
- Your experience is created with the default web address ending in
/ai-os, and you’re taken to the JARVIS AI OS settings page.
yourdomain.com/ai-os, that is what prospects will visit.
After enabling the experience
The Experiences catalog shows the experience status, onboarding step count, public path, and prospect or customer counts. Use the experience controls to manage availability and open its settings.Phone provisioning
The “Give customers a phone number” toggle controls whether each converted customer’s JARVIS agent is assigned a phone number (imported or purchased) so they can also call their assistant. When off, customers use the in-portal voice demo only.
To change the setting:
- Open JARVIS AI OS → Settings.
- Find the Give customers a phone number card.
- Click the toggle. The change saves immediately.
- If phone is on, a secondary toggle appears: Skip phone for free-trial customers. Toggle as needed.

Free-trial credits
When you allow free trial access (configured in the Customer Portal section below), each trial customer receives a credit grant on signup. The default is 100 credits. To change the credit amount:- Scroll to the Free-trial credits card on the JARVIS AI OS settings page.
- Enter the new credit value.
- Click Save.
Customer Portal settings
The Customer Portal section controls how your customers see their portal after signing up:- Assistant name — the persona name displayed in the portal (e.g. “ARIA”, “NOVA”, “JARVIS”). This name is used on the landing page, in the onboarding wizard, and inside the customer’s AI OS dashboard.
- Branding — primary colour, logo, and headline copy shown in the customer portal.
- Dashboard template — defaults to the AI OS layout with the voice ORB. You can override this if needed.
- Sidebar visibility — which portal sections are shown to JARVIS AI OS customers.
- Allow free trial — when on, prospects can sign up without paying. They receive the credit amount configured in the Free-trial credits panel above.
What prospects see — the landing page
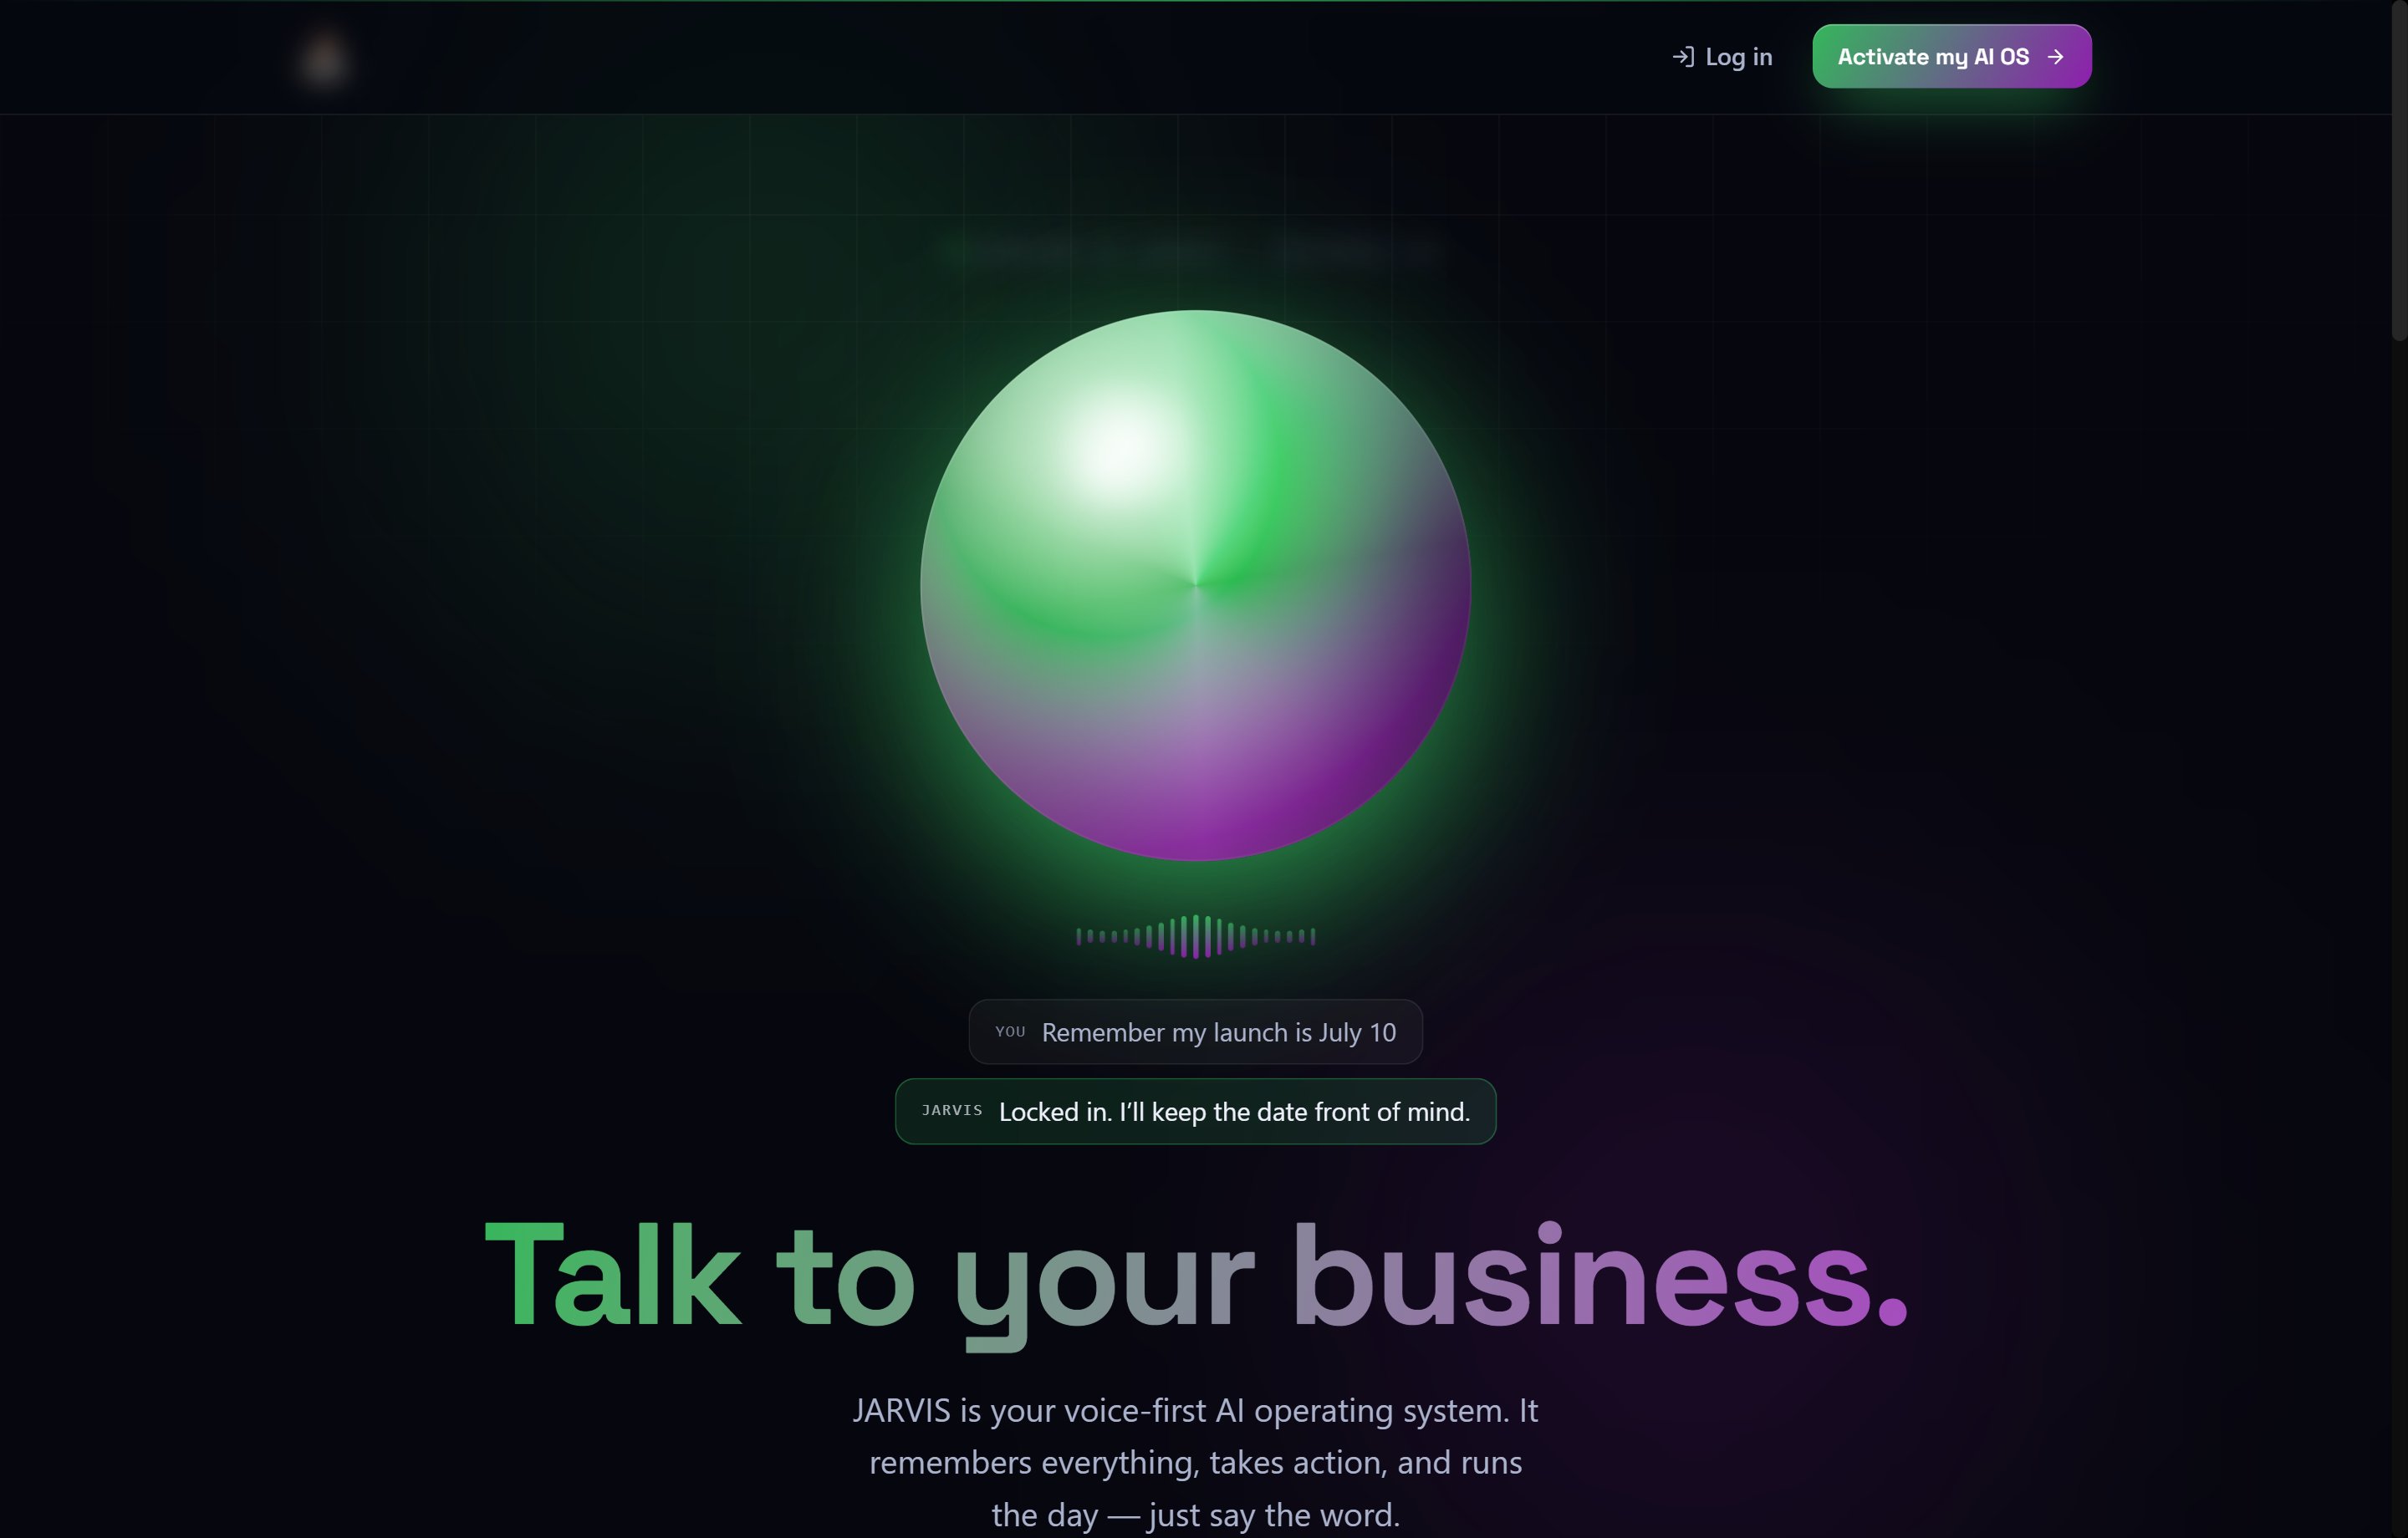
When a prospect visits your landing page (e.g.yourdomain.com/ai-os), they see a partner-branded page positioned around your assistant name. The page is generated from your branding and assistant-name settings — no code changes required.
The page includes a prominent “Activate [AssistantName]” call-to-action that opens the 4-step onboarding wizard.
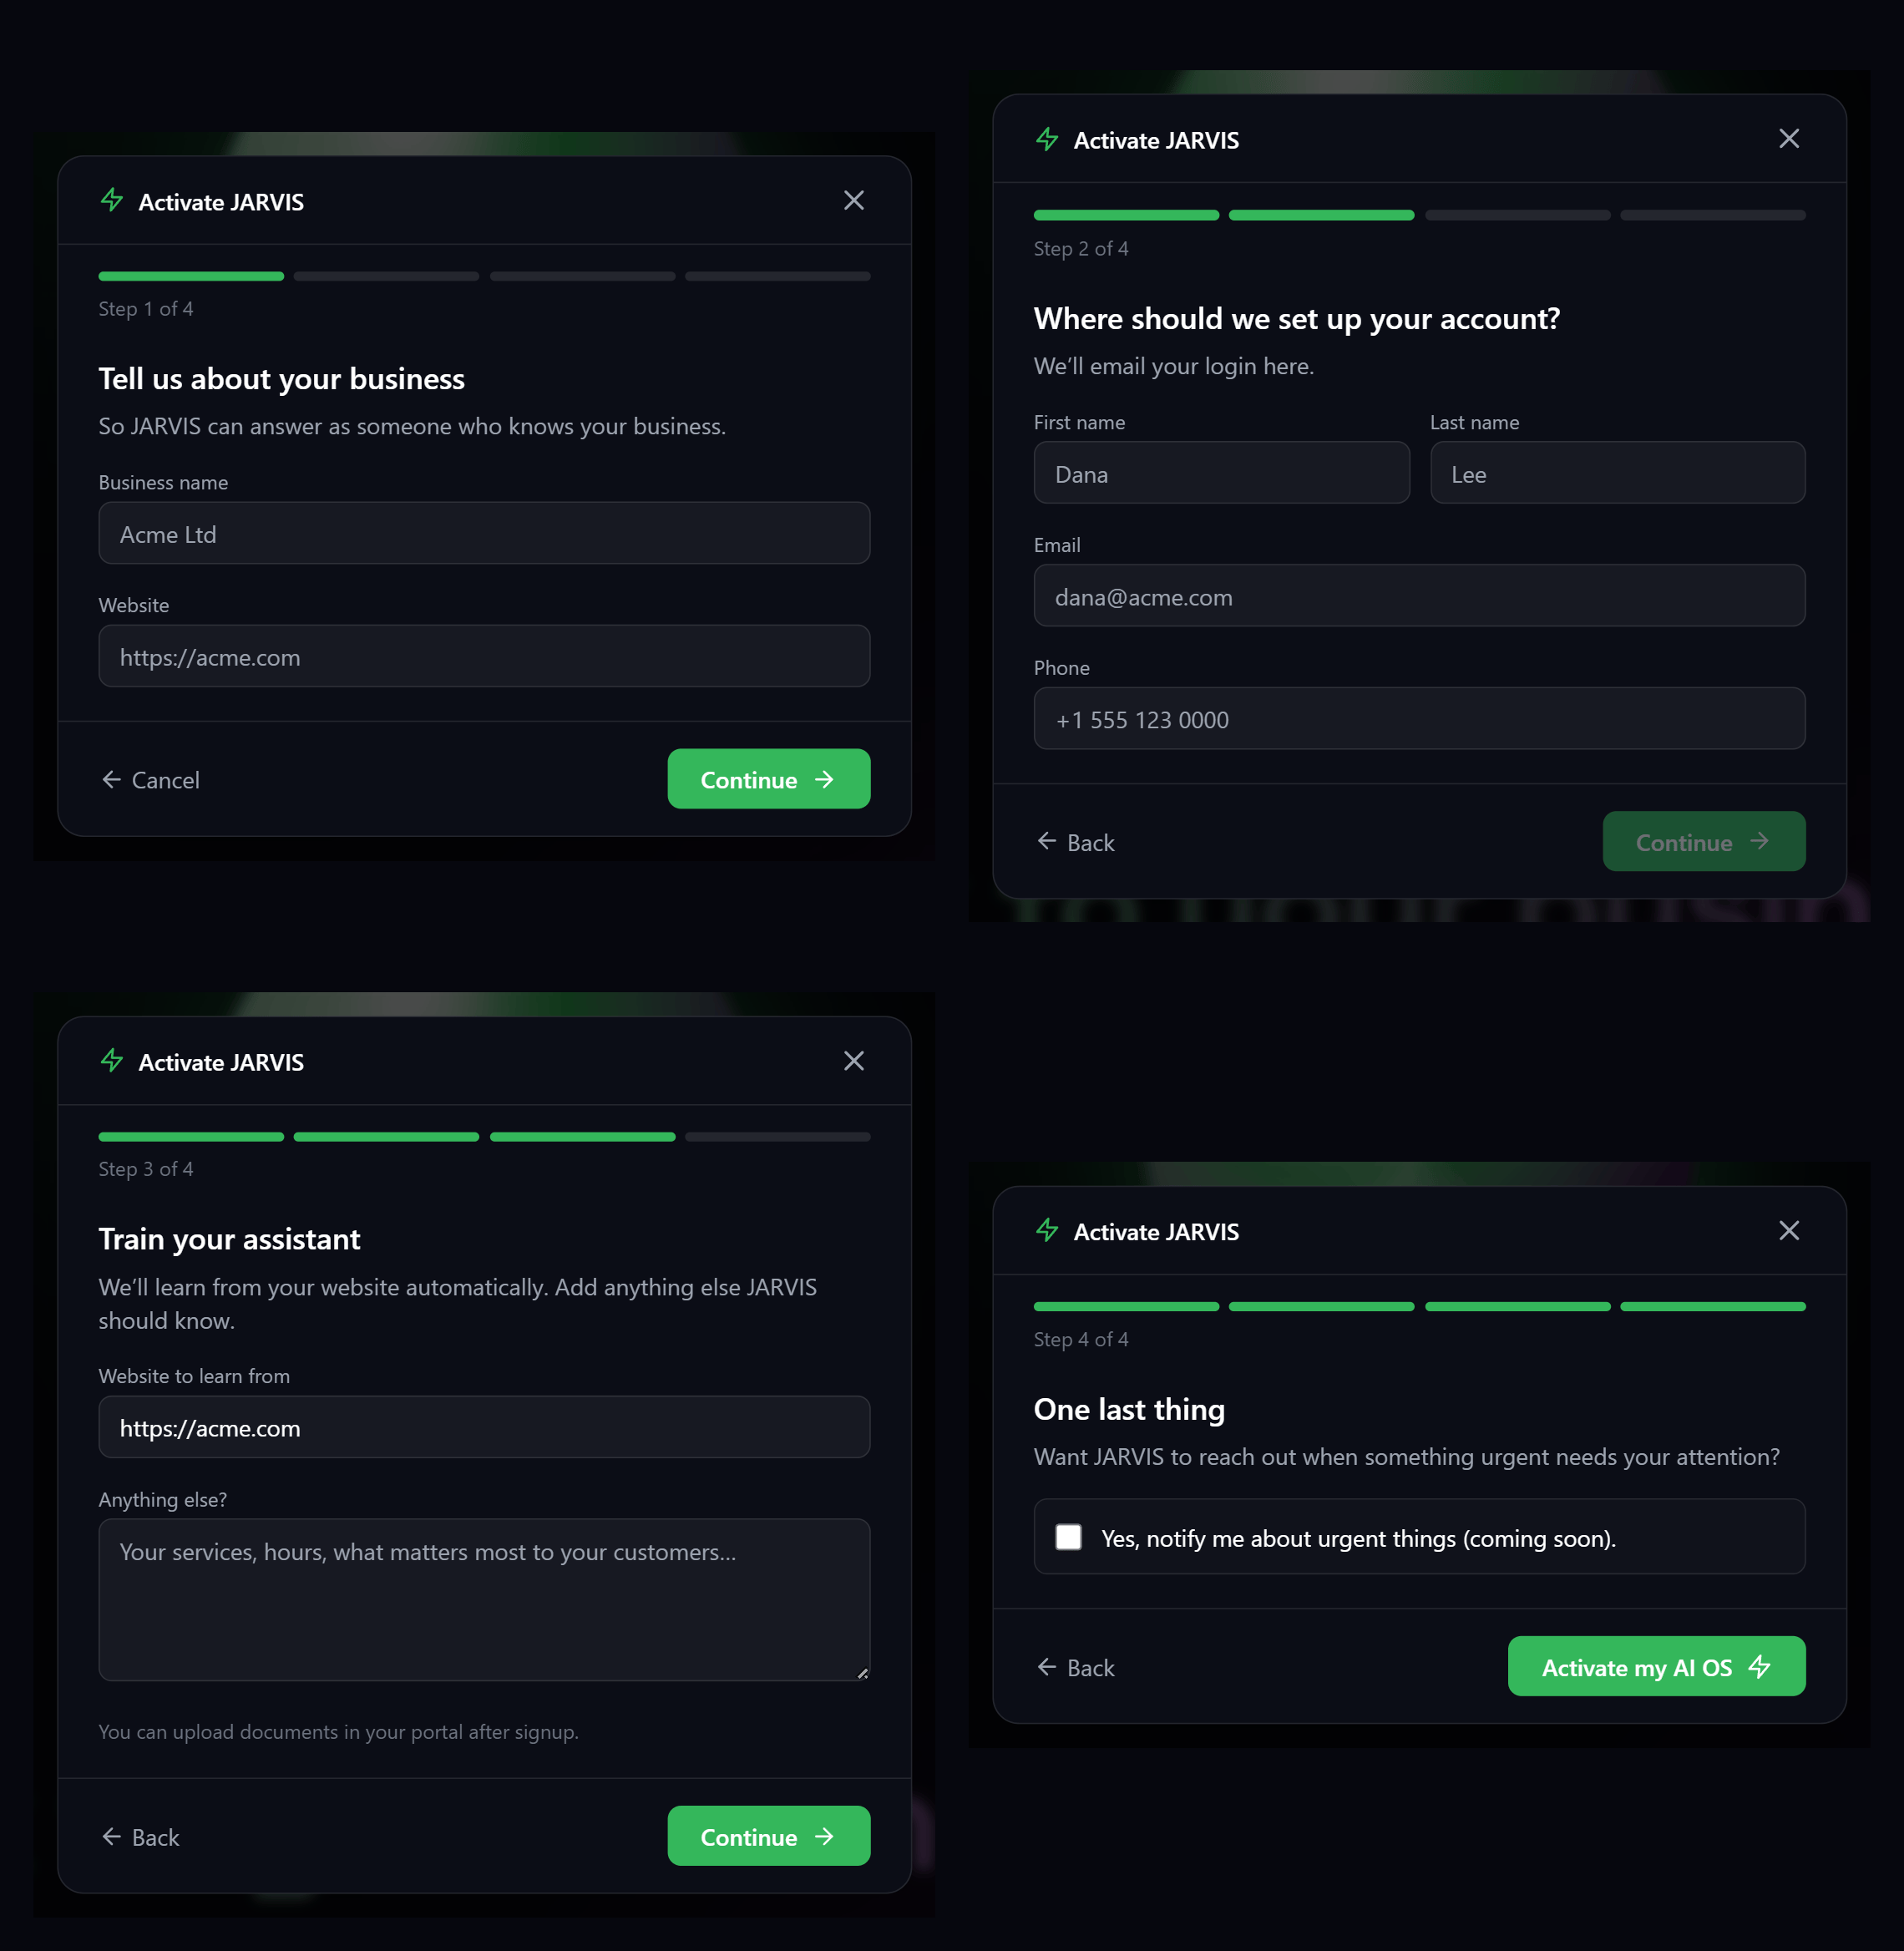
4-step onboarding wizard
After clicking the CTA, prospects complete a 4-step wizard before their account is created:
On completion the wizard submits a prospect record and triggers provisioning. The prospect sees a confirmation:
“You’re all set — [AssistantName] is being prepared. Check your email for your login. Once your assistant is ready, open your portal and tap the orb to start talking.”
What happens after signup — automatic provisioning
After a prospect converts (free-trial or paid), the platform sets up the customer’s JARVIS assistant automatically. This all happens in the background:
You can follow the setup progress from the customer’s details in your partner portal.
If setup fails at any step, it retries automatically. If it keeps failing, check the customer’s Deployment Status under Partner Portal → Customers → [Customer].
The AI OS dashboard — talking to JARVIS
Once setup is done, the customer logs in and lands on the AI OS dashboard. The centrepiece is a voice orb. Tapping the orb starts a live voice conversation with their JARVIS assistant, right in the browser. The orb moves through four states:
The assistant answers from the customer’s knowledge base, uses their connected tools, and remembers past conversations.
Viewing prospects and customers
Prospects who complete the onboarding wizard (but have not yet converted) appear in Partner Portal → Prospects under the JARVIS AI OS experience type. Converted customers appear in Partner Portal → Customers and show their JARVIS provisioning status in the Deployment Status column.Customer portal availability
JARVIS customers receive their assistant in the customer portal after provisioning. The current production and development validation confirmed the Experimental catalog card, but did not expose a customer Work page or task-approval screen. Treat those behaviors as unconfirmed until they are available in an enabled customer portal.Known limitations (Experimental)
- Experimental status. The Experiences catalog labels JARVIS AI OS as Experimental. Use it for demos and early pilots.
- Browser voice only, unless you turn on phone numbers. Customers can talk to their JARVIS in the browser by default. To add phone access, turn on phone numbers in settings and make sure your phone credentials are set up in your white-label settings.
- Website learning takes a little time. The knowledge base is created right away, but reading the customer’s website happens in the background. The assistant may not know everything about their website for the first few minutes after the “ready” email.
- Urgent notifications aren’t active yet. The “notify me about urgent things” choice from onboarding is saved, but doesn’t trigger any calls yet. It’s planned for a future update.