> ## Documentation Index
> Fetch the complete documentation index at: https://docs.knotie-ai.pro/llms.txt
> Use this file to discover all available pages before exploring further.
# Agency command center: run outbound campaigns for clients without extra middleware
> Use Knotie Partner Portal to separate clients, map numbers to agents, enforce credits, and trigger outbound calls from GHL natively.
## Who this is for
This playbook is for agencies that:
* Run outbound lead follow-up for multiple clients
* Need clean separation by client (billing, credits, reporting)
* Want to avoid adding extra platforms (middleware costs + complexity)
## The client concern this solves
A common objection to outbound automation stacks is:
* “I don’t want to pay for Knotie *and* another automation platform.”
With Knotie’s **native GHL webhook support**, you can often remove the “middleware” layer that was previously used only for payload shaping.
## What you'll build
A repeatable client delivery process:
1. Onboard a client as a **Customer**
2. Import a phone number (Twilio or Retell)
3. Assign a voice agent to that number with **Outbound** enabled
4. Generate a per-number outbound webhook key (`owk_...`)
5. Add a GHL workflow webhook step using that key
For multi-client outbound, plan to import one outbound-capable agent **per client** (Retell is the most reliable). Agents are scoped to a single customer in the assign-agent picker, so a single shared agent won't cover all your clients.
> 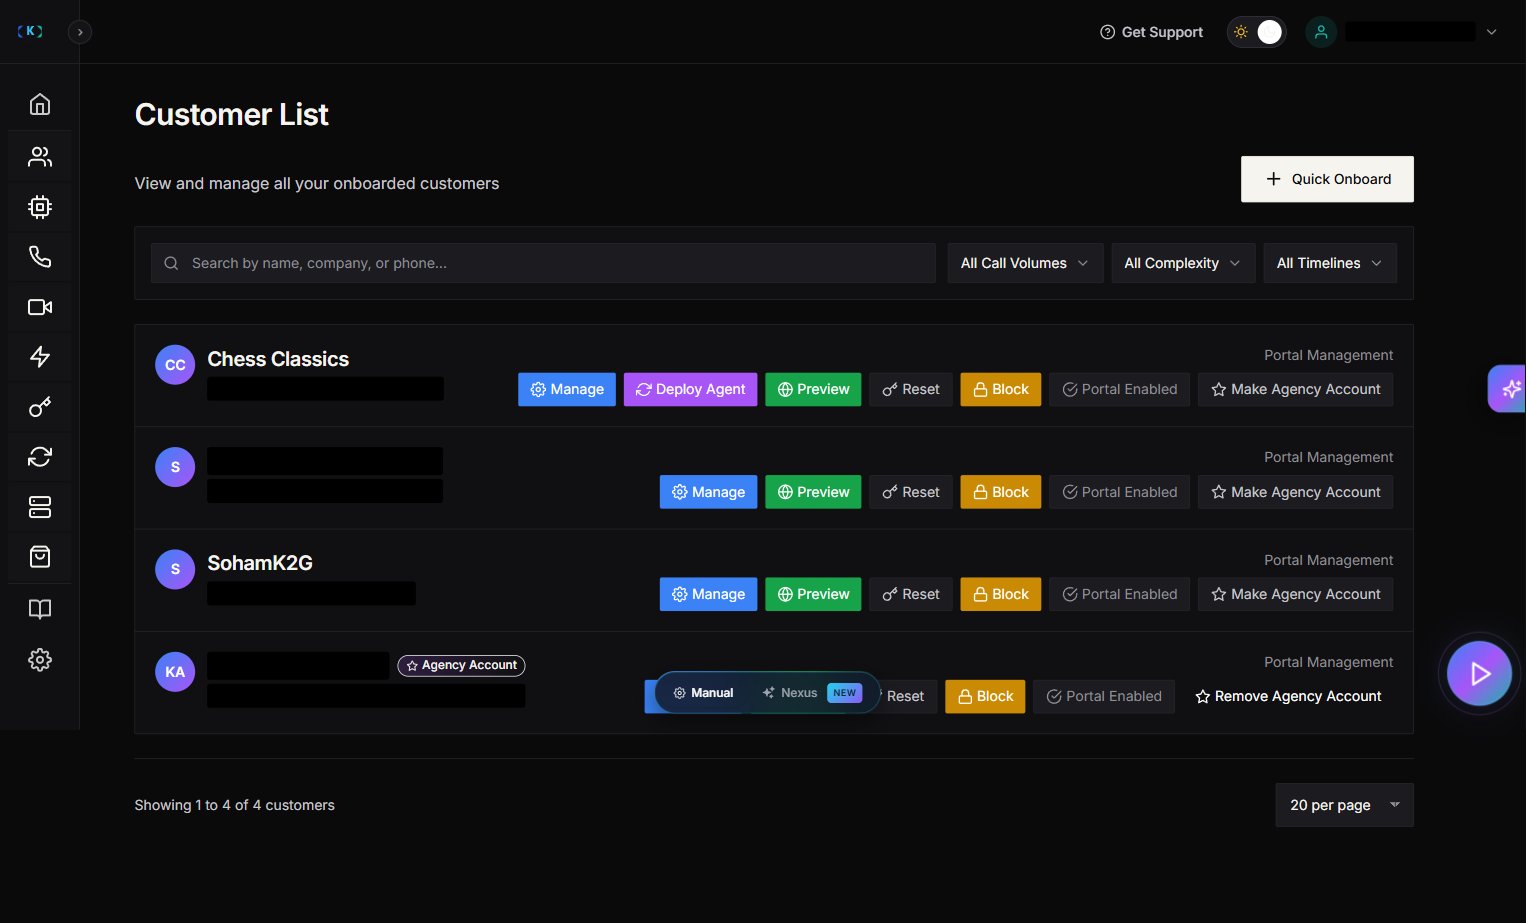 ## Step 1 — Onboard the client as a customer
1. Partner Portal → **Customers**
2. Create the customer record
3. (Optional) Enable customer portal access if you want them to see call logs/credits
## Step 1 — Onboard the client as a customer
1. Partner Portal → **Customers**
2. Create the customer record
3. (Optional) Enable customer portal access if you want them to see call logs/credits
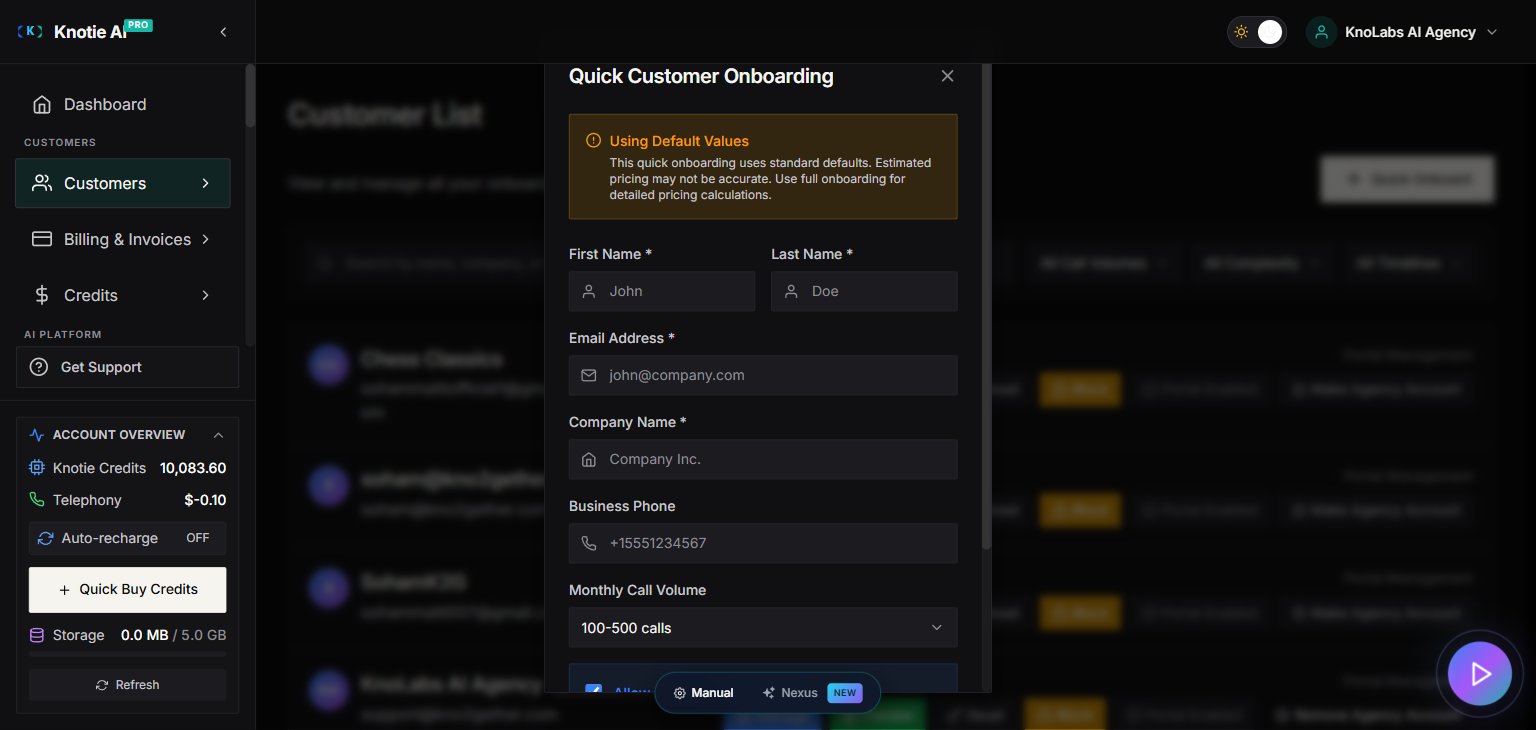 ## Step 2 — Set up credits (so usage is enforceable)
Why credits matter:
* Agencies need a hard stop to prevent runaway spend
* Clients need predictable billing
1. Open customer **Manage** modal
2. Go to **Credits**
3. Add credits for the customer
## Step 2 — Set up credits (so usage is enforceable)
Why credits matter:
* Agencies need a hard stop to prevent runaway spend
* Clients need predictable billing
1. Open customer **Manage** modal
2. Go to **Credits**
3. Add credits for the customer
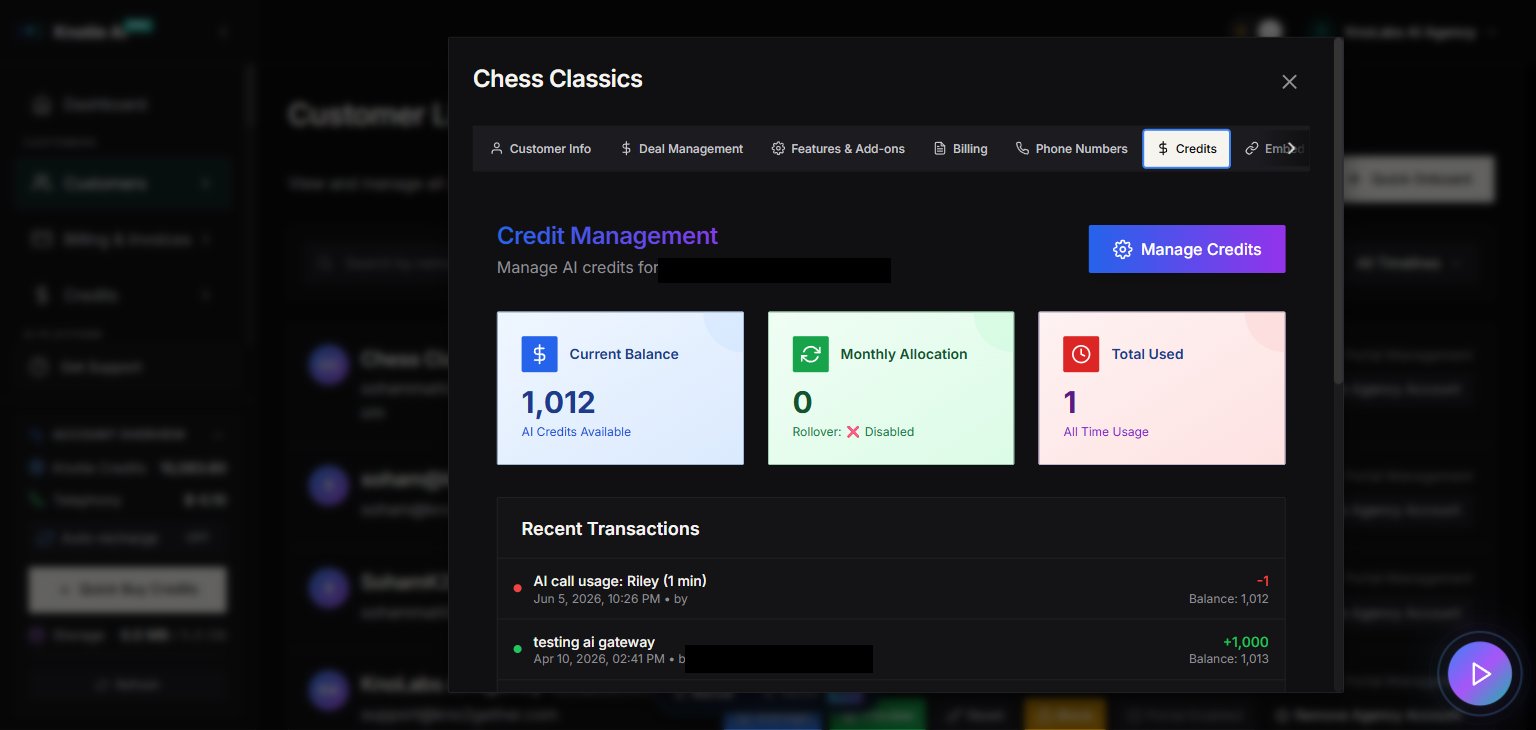 ## Step 3 — Import and assign a phone number
1. Partner Portal → **Phone Numbers**
2. Import from:
* **Twilio** (owned in Twilio)
* **Retell** (purchased inside Retell)
3. Assign the number to the client/customer
The Assign Customer picker is a typeahead — type the client's first name, last name, or email. The Phone Numbers list shows the **contact name**, not the brand/company name from your Customers list, so the same client may appear under either name depending on where you're looking.
## Step 3 — Import and assign a phone number
1. Partner Portal → **Phone Numbers**
2. Import from:
* **Twilio** (owned in Twilio)
* **Retell** (purchased inside Retell)
3. Assign the number to the client/customer
The Assign Customer picker is a typeahead — type the client's first name, last name, or email. The Phone Numbers list shows the **contact name**, not the brand/company name from your Customers list, so the same client may appear under either name depending on where you're looking.
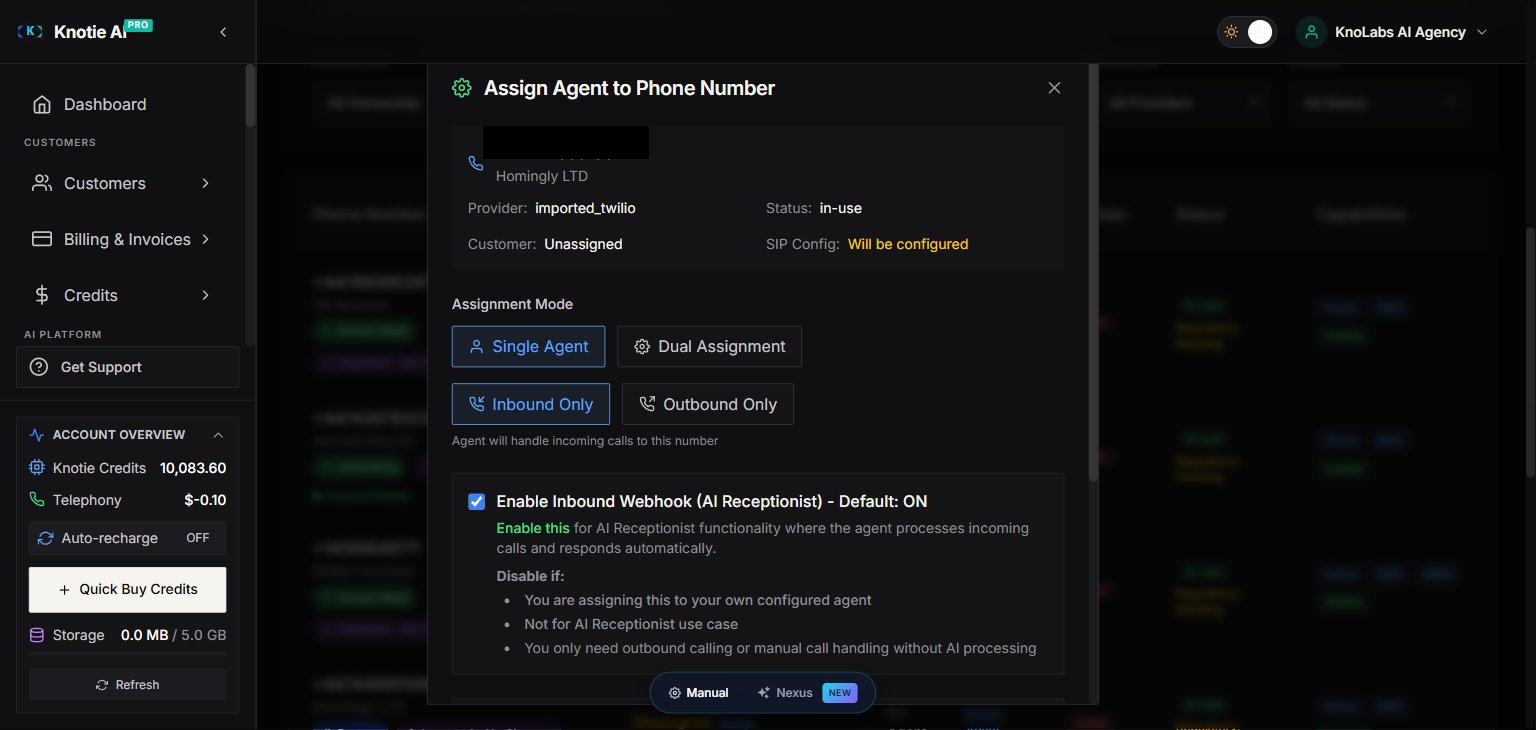
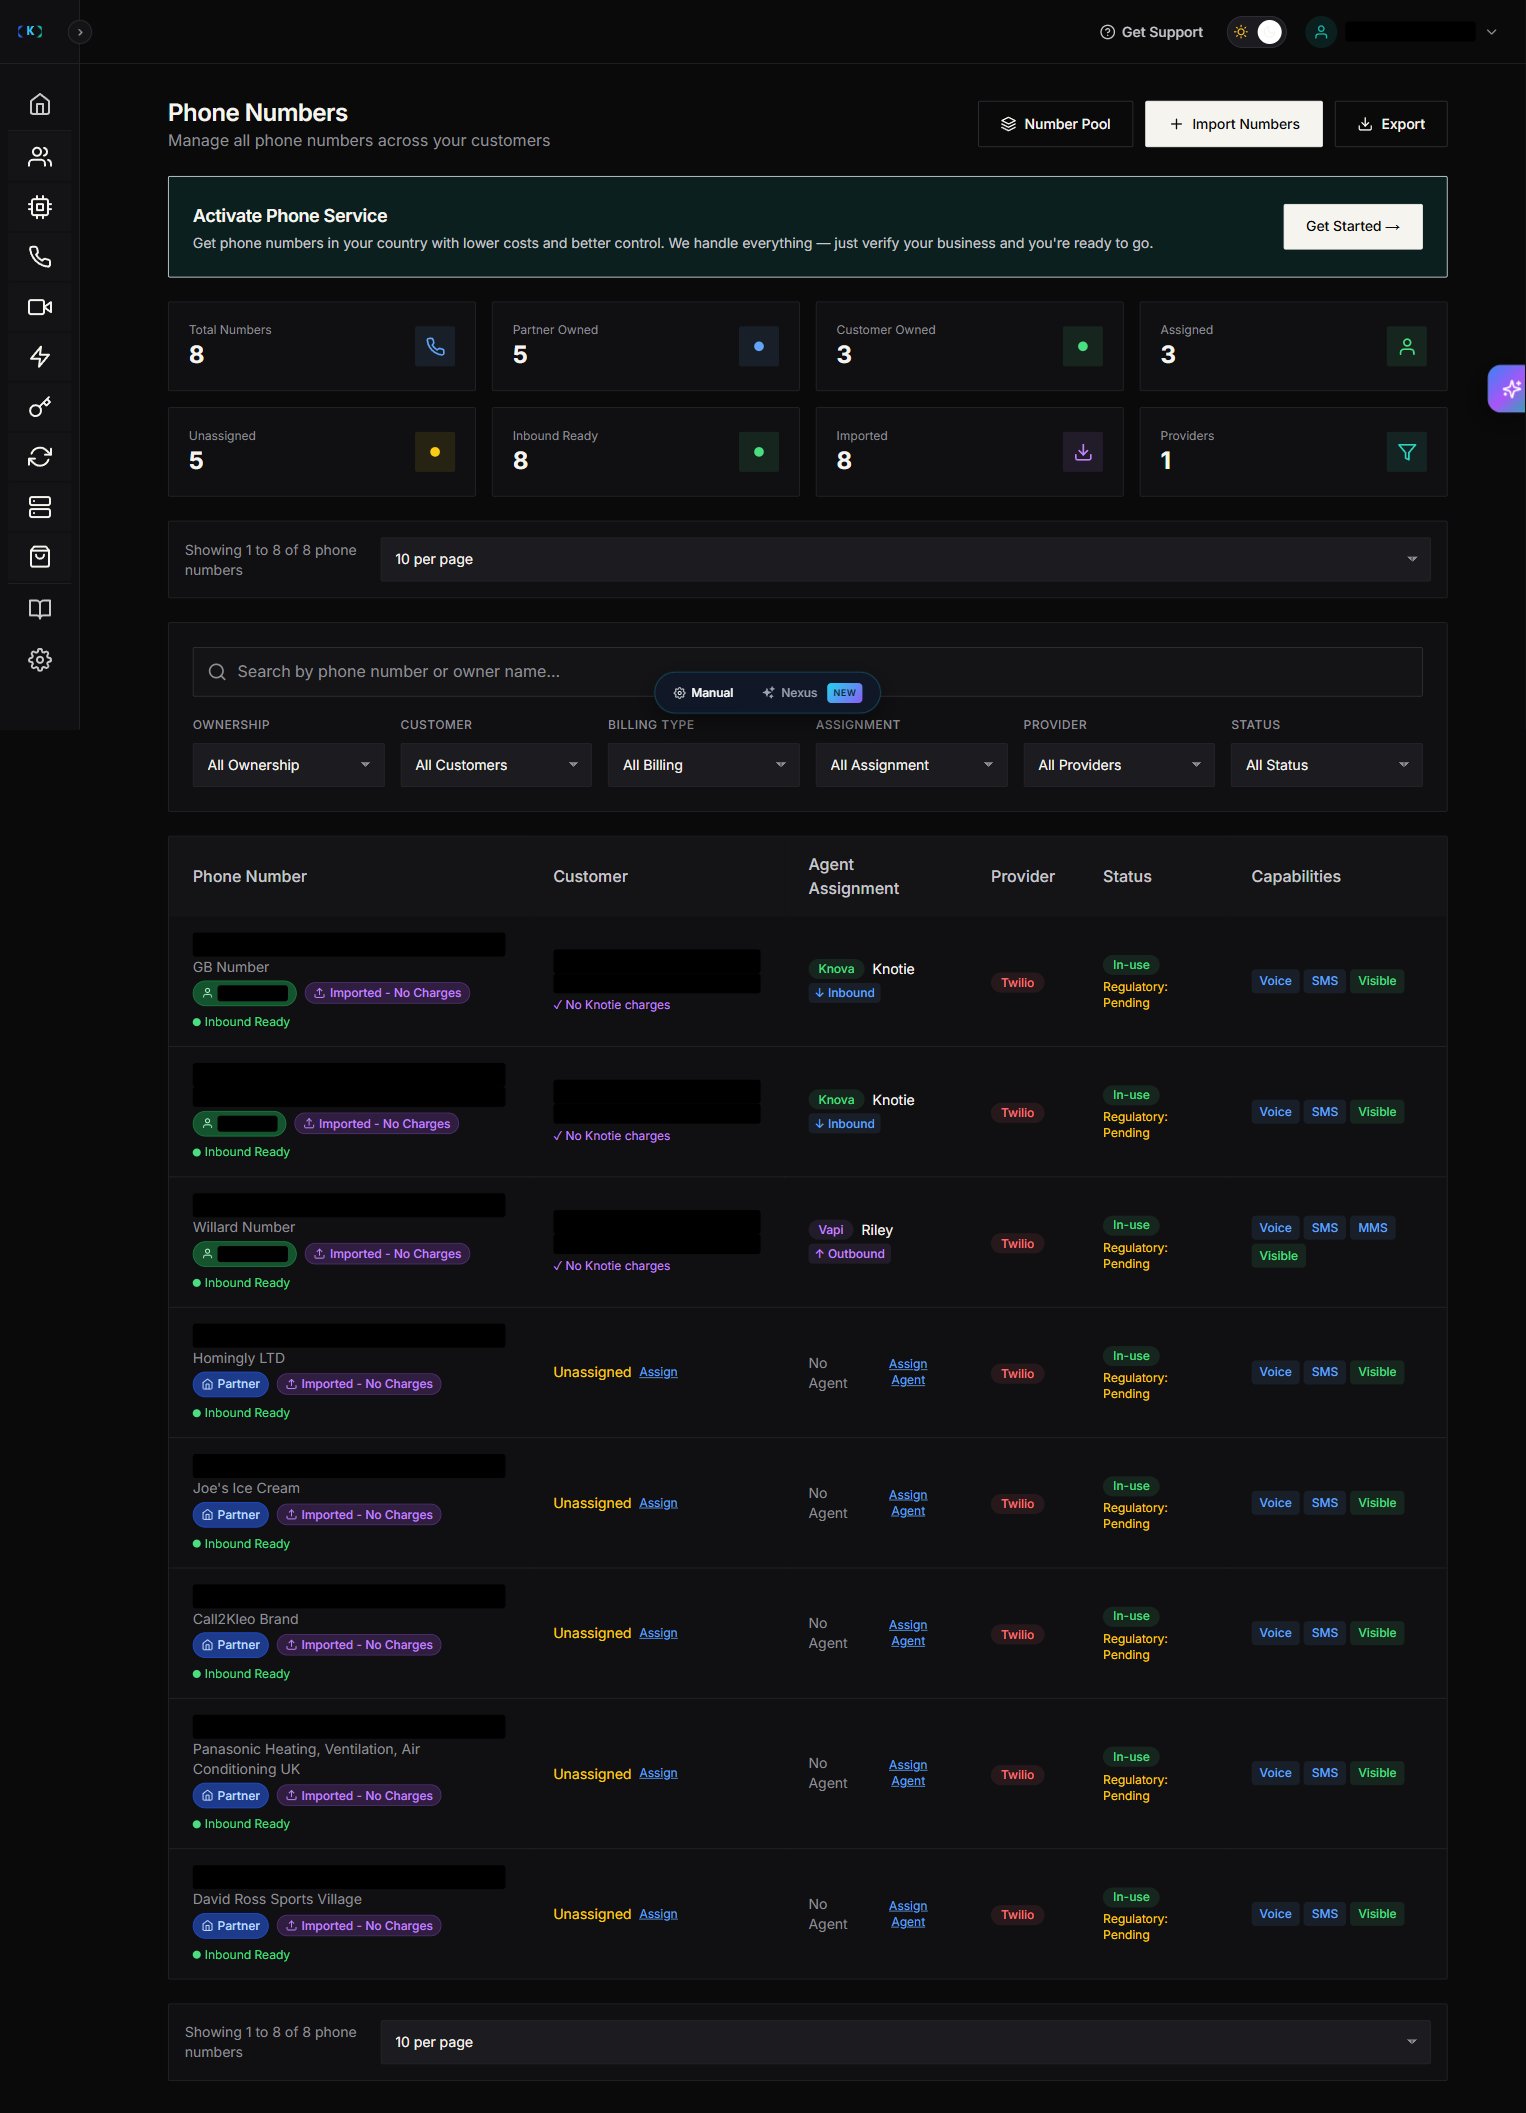 ## Step 4 — Assign the outbound agent
1. In the phone numbers table, click **Assign Agent**
2. Select the correct provider agent
3. Enable **Outbound**
In the **Assign Agent** modal, switch the **Direction** toggle from **Inbound Only** (the default) to **Outbound Only**. The default is set up for AI-receptionist use, not for outbound campaigns.
The agent dropdown is scoped to the customer on this number — only agents belonging to that client will appear. If you don't see an agent, you may need to create or import one for that client first.
## Step 4 — Assign the outbound agent
1. In the phone numbers table, click **Assign Agent**
2. Select the correct provider agent
3. Enable **Outbound**
In the **Assign Agent** modal, switch the **Direction** toggle from **Inbound Only** (the default) to **Outbound Only**. The default is set up for AI-receptionist use, not for outbound campaigns.
The agent dropdown is scoped to the customer on this number — only agents belonging to that client will appear. If you don't see an agent, you may need to create or import one for that client first.
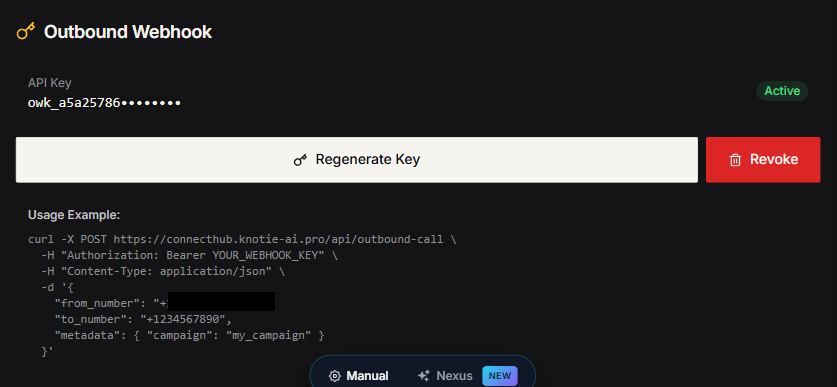
 ## Step 5 — Generate a dedicated webhook key
Each outbound-mapped phone number has its own key.
1. Open phone number details
2. Generate **Outbound Webhook Key**
3. Store in your agency vault/password manager
The Outbound Webhook section only appears for numbers with an outbound-capable agent assigned. If you don't see it, double-check the Direction toggle in Step 4 — it must be set to **Outbound Only**.
## Step 5 — Generate a dedicated webhook key
Each outbound-mapped phone number has its own key.
1. Open phone number details
2. Generate **Outbound Webhook Key**
3. Store in your agency vault/password manager
The Outbound Webhook section only appears for numbers with an outbound-capable agent assigned. If you don't see it, double-check the Direction toggle in Step 4 — it must be set to **Outbound Only**.
 ## Step 6 — Connect the client's GHL workflow
In the client's GoHighLevel account:
* Add a Webhook step:
* `POST https://connecthub.knotie-ai.pro/api/outbound-call`
* Add `Authorization: Bearer owk_...`
* Add required custom data:
* `from_number`
* `to_number`
* Add a `metadata` object with any personalization variables your agent expects
Example body:
```json theme={null}
{
"from_number": "+1XXXXXXXXXX",
"to_number": "{{contact.phone_raw}}",
"metadata": {
"client": "client_name",
"campaign": "campaign_id"
}
}
```
## Delivery checklist (copy/paste)
* Customer created
* Credits added
* Number imported
* Customer assigned to number
* Agent assigned to number (Outbound enabled)
* Outbound key generated and stored
* GHL workflow published
* Test lead submitted and call verified
## Best practices
* Use **warm lead timing** (call within minutes)
* Keep your outbound agent CTA simple (book, qualify, route)
* Rotate numbers if you see spam flagging patterns
## Step 6 — Connect the client's GHL workflow
In the client's GoHighLevel account:
* Add a Webhook step:
* `POST https://connecthub.knotie-ai.pro/api/outbound-call`
* Add `Authorization: Bearer owk_...`
* Add required custom data:
* `from_number`
* `to_number`
* Add a `metadata` object with any personalization variables your agent expects
Example body:
```json theme={null}
{
"from_number": "+1XXXXXXXXXX",
"to_number": "{{contact.phone_raw}}",
"metadata": {
"client": "client_name",
"campaign": "campaign_id"
}
}
```
## Delivery checklist (copy/paste)
* Customer created
* Credits added
* Number imported
* Customer assigned to number
* Agent assigned to number (Outbound enabled)
* Outbound key generated and stored
* GHL workflow published
* Test lead submitted and call verified
## Best practices
* Use **warm lead timing** (call within minutes)
* Keep your outbound agent CTA simple (book, qualify, route)
* Rotate numbers if you see spam flagging patterns