> ## Documentation Index
> Fetch the complete documentation index at: https://docs.knotie-ai.pro/llms.txt
> Use this file to discover all available pages before exploring further.
# Auto-Install Experiences
> Sell one-click AI products — OpenClaw Auto-Install and Hermes Auto-Install — that provision a private VPS, deploy the agent, and fund AI credits automatically when a customer subscribes.
## What are Auto-Install Experiences?
Auto-Install Experiences let your customers buy a fully managed AI product from your branded landing page. When they complete checkout, the platform automatically:
1. Creates their customer account
2. Provisions a dedicated private server
3. Deploys and configures the AI agent
4. Funds the account with the plan's AI credits
5. Enables their portal (AI Chat + Infrastructure dashboard)
6. Sends a welcome email with login details
No manual steps are required from you or the customer.
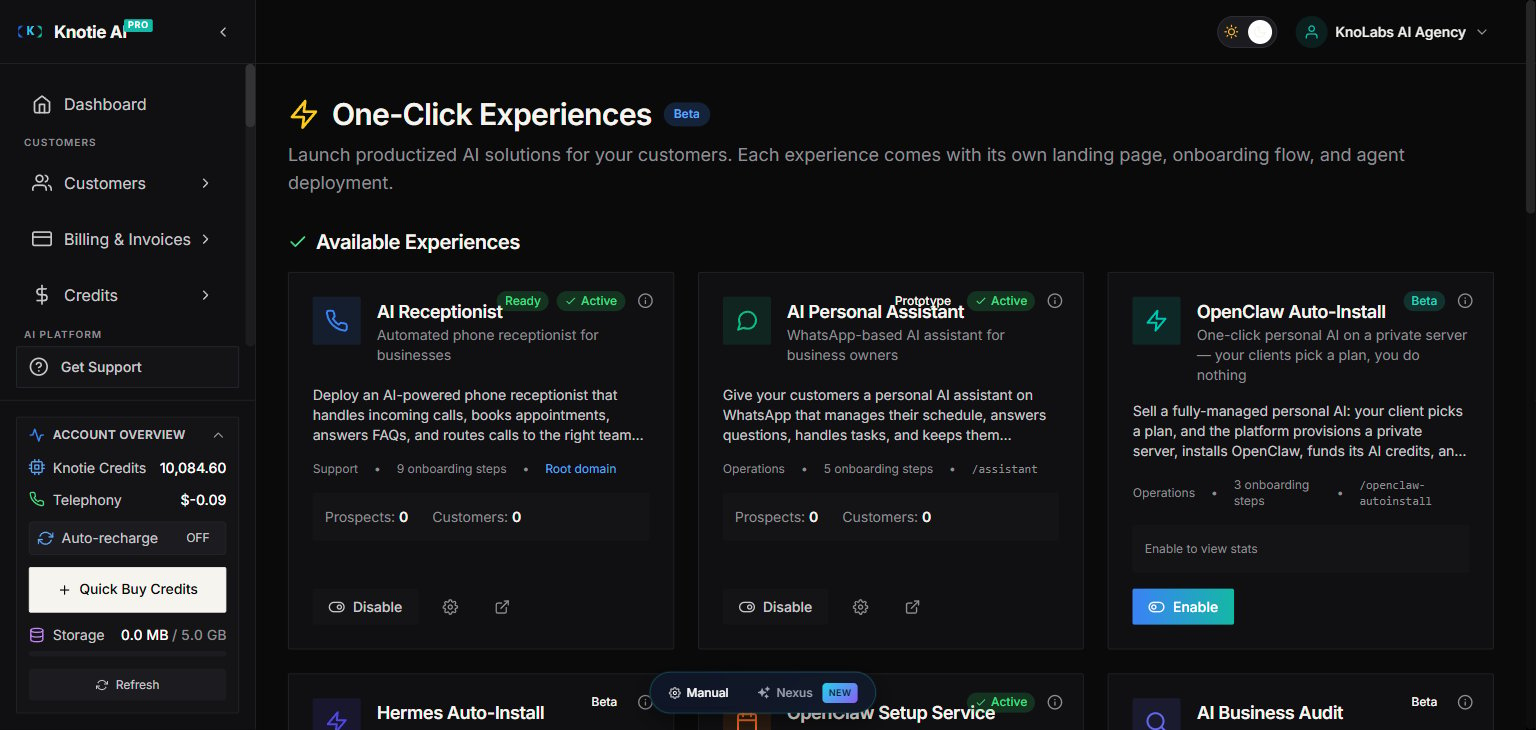
The Partner Portal **One-Click Experiences** catalog contains 8 active + 8 Coming Soon cards (AI Receptionist, AI Personal Assistant, OpenClaw Setup Service, AI Business Audit, Resell AI Gateway, etc.). This page covers only the **Auto-Install** sub-slice of that catalog.
Two auto-install experiences are currently in **Beta**:
| Experience | What deploys |
| --------------------- | ---------------------------------------------------------------------------------------- |
| OpenClaw Auto-Install | OpenClaw agent accessible via Telegram; connects Gmail, Google Calendar, Notion and more |
| Hermes Auto-Install | Nous Research Hermes autonomous agent (web browsing, code execution, persistent memory) |
Both experiences are currently **Beta**. Core functionality — provisioning, deployment, billing, credit refill, and portal access — works end to end. Visual polish and per-plan landing page customisation are fast-follows.
***
## Prerequisites
Before enabling either auto-install experience:
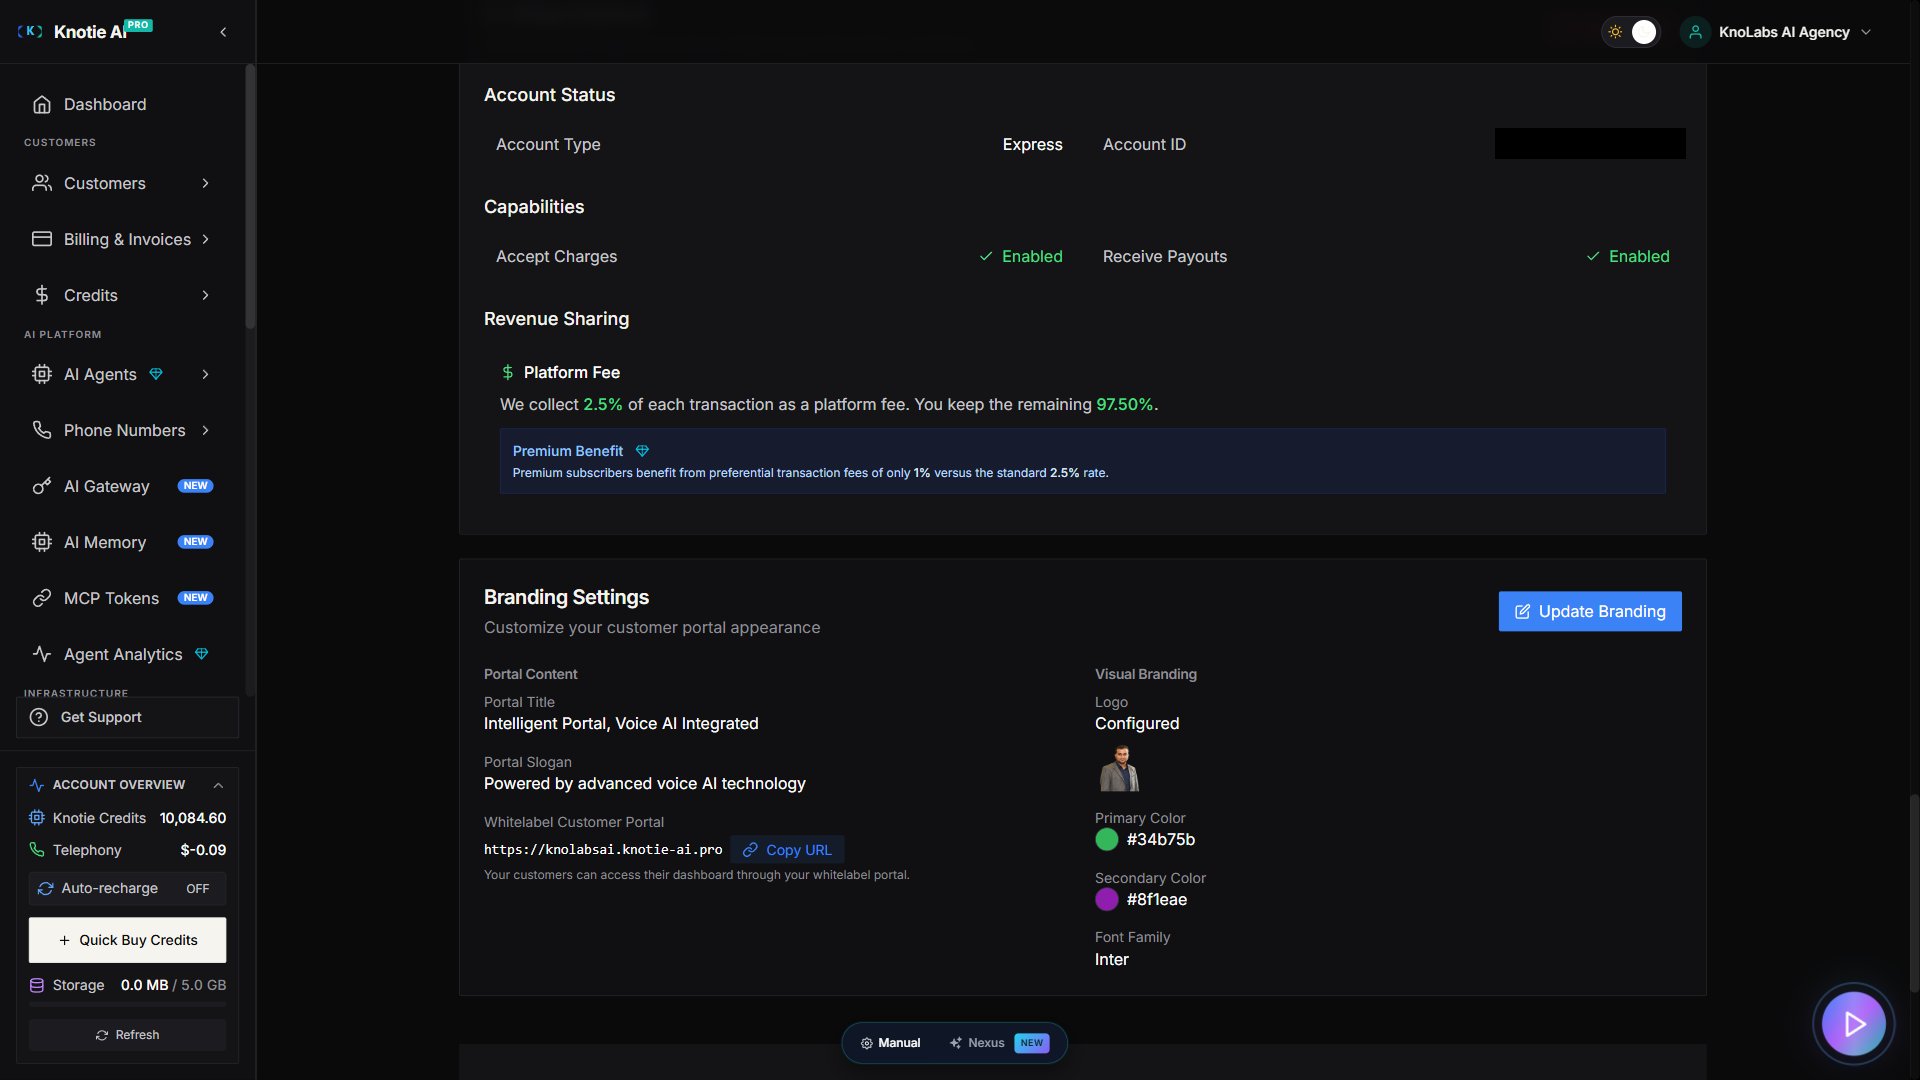
1. **Stripe Connect** must be active and fully onboarded. The customer checkout runs on your Stripe Connect account. Go to **Settings → Stripe Connect** to verify.
2. **Server capacity**: each subscriber gets a dedicated private server. Make sure you have capacity for the expected subscriber volume.
 ***
## Enable an auto-install experience
1. Go to **Experiences** in the Partner Portal sidebar.
2. Find the card for **OpenClaw Auto-Install** or **Hermes Auto-Install**.
3. Click the **Enable** toggle.
4. The experience is now live at your partner domain at its default alias:
* OpenClaw Auto-Install: `/{your-domain}/openclaw-autoinstall`
* Hermes Auto-Install: `/{your-domain}/hermes-autoinstall`
***
## Enable an auto-install experience
1. Go to **Experiences** in the Partner Portal sidebar.
2. Find the card for **OpenClaw Auto-Install** or **Hermes Auto-Install**.
3. Click the **Enable** toggle.
4. The experience is now live at your partner domain at its default alias:
* OpenClaw Auto-Install: `/{your-domain}/openclaw-autoinstall`
* Hermes Auto-Install: `/{your-domain}/hermes-autoinstall`
 ***
## Configure pricing tiers
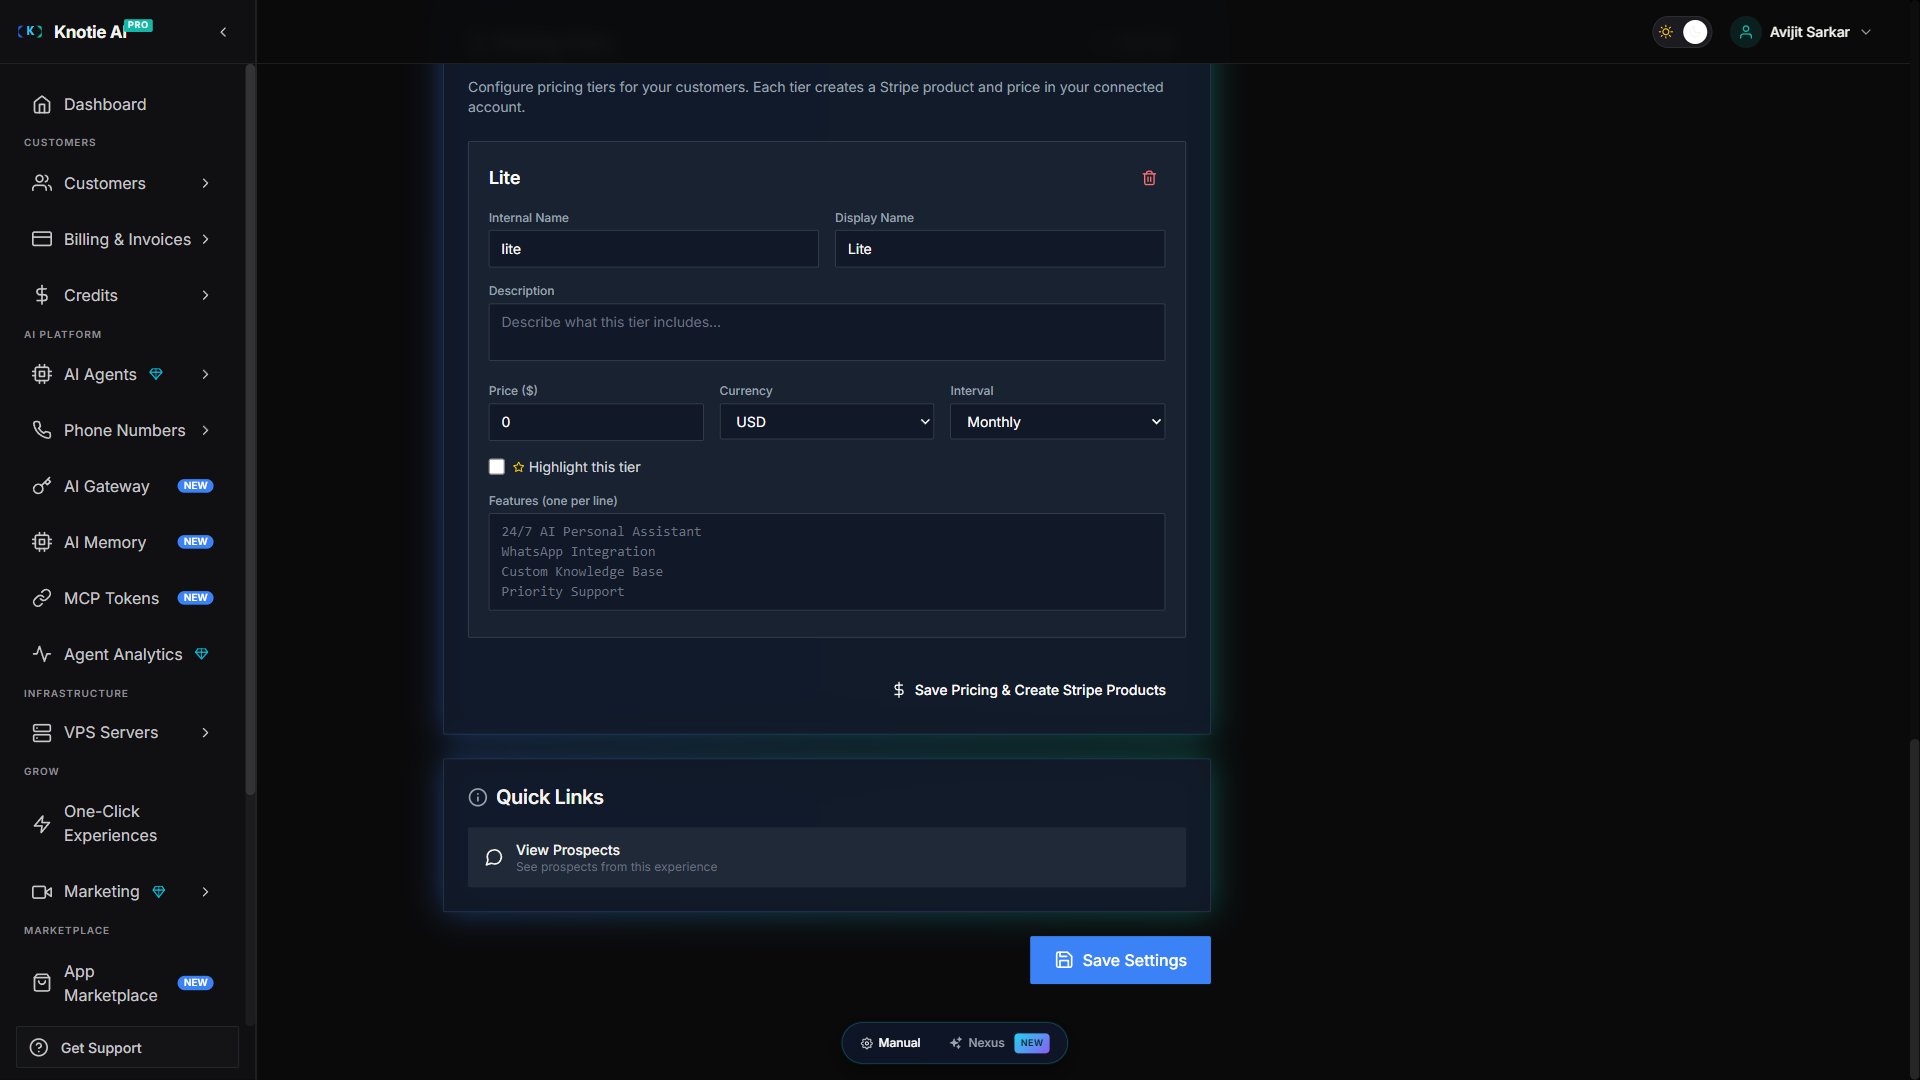
Each auto-install experience supports multiple subscription plans ("tiers"). You define the server spec and AI credit allowance per tier; the platform sets up a recurring subscription price for each one automatically.
### Open the experience settings
1. Click the **Settings** (gear ⚙) icon on the experience card.
2. Scroll to the **Pricing Tiers** section.
### Add or edit a tier
For each tier, configure:
| Field | Description |
| ---------------------- | ------------------------------------------------------------------------------ |
| **Plan name** | Displayed to customers on the landing page (e.g. "Starter", "Pro", "Scale") |
| **Price** | Monthly subscription price in your currency |
| **VPS Plan** | The server spec to provision (CPU / RAM / storage options shown as a dropdown) |
| **AI Credits / month** | Number of AI credits included in the monthly subscription |
| **Enabled** | Toggle the tier on/off without deleting it |
Save the tier to set up a matching recurring subscription price on your Connect account. Existing subscribers are **not** migrated automatically when you change a tier's price — only new checkouts use the new price.
***
## Configure pricing tiers
Each auto-install experience supports multiple subscription plans ("tiers"). You define the server spec and AI credit allowance per tier; the platform sets up a recurring subscription price for each one automatically.
### Open the experience settings
1. Click the **Settings** (gear ⚙) icon on the experience card.
2. Scroll to the **Pricing Tiers** section.
### Add or edit a tier
For each tier, configure:
| Field | Description |
| ---------------------- | ------------------------------------------------------------------------------ |
| **Plan name** | Displayed to customers on the landing page (e.g. "Starter", "Pro", "Scale") |
| **Price** | Monthly subscription price in your currency |
| **VPS Plan** | The server spec to provision (CPU / RAM / storage options shown as a dropdown) |
| **AI Credits / month** | Number of AI credits included in the monthly subscription |
| **Enabled** | Toggle the tier on/off without deleting it |
Save the tier to set up a matching recurring subscription price on your Connect account. Existing subscribers are **not** migrated automatically when you change a tier's price — only new checkouts use the new price.
 ***
## Customer checkout flow
When a customer visits your landing page and picks a plan:
1. They are redirected to a **Stripe Checkout** page on your Connect account.
2. On successful payment, setup begins automatically:
* Account created (customer + portal login)
* AI credits funded for the plan
* A dedicated private server provisioned
* Agent deployed to the server
* Portal features unlocked: AI Chat + Infrastructure / Agency dashboard
3. A welcome email is sent to the customer with their login details. **No password is ever collected at checkout** — the platform generates a secure temporary password and delivers it by email.
### Checking order status
While setup runs, the customer's landing page shows a live progress indicator — the server provisions and the agent deploys (typically 2–5 minutes) before the account is ready.
***
## Customer checkout flow
When a customer visits your landing page and picks a plan:
1. They are redirected to a **Stripe Checkout** page on your Connect account.
2. On successful payment, setup begins automatically:
* Account created (customer + portal login)
* AI credits funded for the plan
* A dedicated private server provisioned
* Agent deployed to the server
* Portal features unlocked: AI Chat + Infrastructure / Agency dashboard
3. A welcome email is sent to the customer with their login details. **No password is ever collected at checkout** — the platform generates a secure temporary password and delivers it by email.
### Checking order status
While setup runs, the customer's landing page shows a live progress indicator — the server provisions and the agent deploys (typically 2–5 minutes) before the account is ready.
 ***
## Ongoing billing
### Monthly credit refill
Each time an auto-install subscription renews and payment succeeds, the platform automatically tops up the customer's AI credit balance to the plan's included credits. No manual action is needed.
### Cancellation
When a subscription is cancelled or payment lapses:
* The customer's AI access is **revoked** — the deployed agent can no longer make model calls.
* The server and its data are **not** automatically deleted (you can manage the server separately under **VPS Servers**).
* If the customer resubscribes, access is restored and the agent is re-funded.
***
## Partner portal visibility
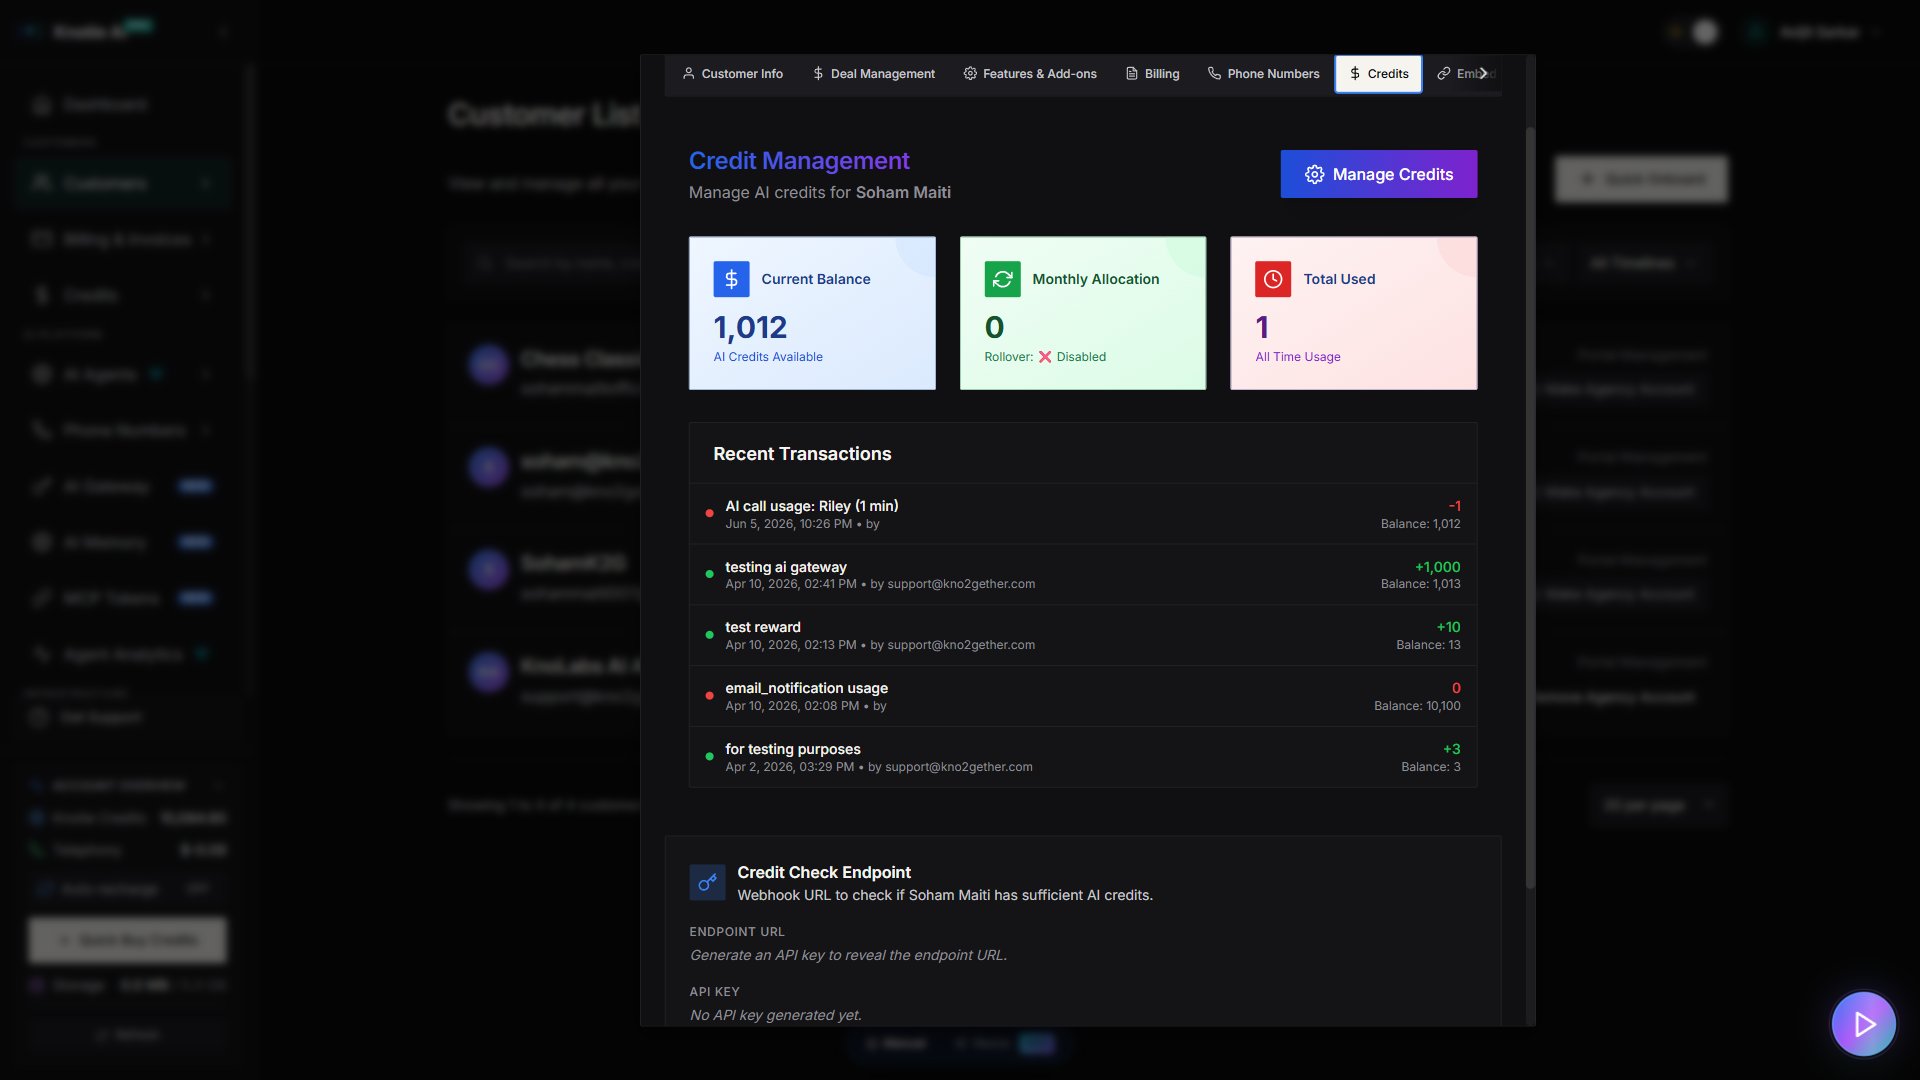
Once a customer completes setup, their record appears in your **Customers** list tagged with the experience type. From their customer page you can:
* View their current credit balance
* Access the VPS Terminal
* See the Infrastructure / Agency dashboard
* Top up credits manually if needed
***
## Ongoing billing
### Monthly credit refill
Each time an auto-install subscription renews and payment succeeds, the platform automatically tops up the customer's AI credit balance to the plan's included credits. No manual action is needed.
### Cancellation
When a subscription is cancelled or payment lapses:
* The customer's AI access is **revoked** — the deployed agent can no longer make model calls.
* The server and its data are **not** automatically deleted (you can manage the server separately under **VPS Servers**).
* If the customer resubscribes, access is restored and the agent is re-funded.
***
## Partner portal visibility
Once a customer completes setup, their record appears in your **Customers** list tagged with the experience type. From their customer page you can:
* View their current credit balance
* Access the VPS Terminal
* See the Infrastructure / Agency dashboard
* Top up credits manually if needed
 ***
## OpenClaw Auto-Install
OpenClaw Auto-Install deploys a personal AI accessible via **Telegram**. Once setup completes, the customer can message their Telegram bot to:
* Read and draft emails via connected Gmail
* Manage Google Calendar (schedule meetings, daily briefings)
* Query and update Notion pages
* And more via the Knotie AI Gateway
The default alias is `/openclaw-autoinstall`. You can change it under **Experience Settings → General**.
### What the customer sees
Landing page hero: *"Your Personal AI. One Click. No Tech Skills Needed."*
After checkout and setup:
* A welcome email arrives with portal login credentials.
* The customer logs in and finds AI Chat enabled in their portal sidebar.
* Their connected apps (Gmail, Calendar, Notion) are listed in the integration panel.
***
## Hermes Auto-Install
Hermes Auto-Install deploys [Nous Research's Hermes](https://hermes-agent.nousresearch.com) — a fully autonomous AI agent — on a **dedicated private VPS**.
Hermes can:
* Browse the live web
* Run shell commands and execute code
* Use tools through the Knotie AI Gateway
* Maintain persistent memory across sessions
The default alias is `/hermes-autoinstall`. You can change it under **Experience Settings → General**.
### What the customer sees
Landing page hero: *"Your Own Autonomous AI. On Your Own Private Server. One Click."*
After checkout and setup:
* A welcome email arrives with portal login credentials.
* The customer logs in and finds AI Chat + Infrastructure dashboard in their portal sidebar.
* They can chat with Hermes directly from the portal — no terminal required.
* The VPS runs Hermes exclusively on dedicated compute (not shared).
For customers who want to interact with Hermes directly over SSH, they can run `hermes chat` in the VPS terminal. Run `hermes doctor` to verify the install health. See [Hermes Agent Setup](/agents/hermes-agent-setup) for the full deploy + chat API reference.
***
## Troubleshooting
**Checkout completes but the customer's portal isn't set up**
Check the order status:
1. In the Partner Portal, open the customer record.
2. Look for a failed or pending auto-install order under their account.
3. If the order is stuck, contact support with the order reference — setup can safely be re-run.
**Server provisioning fails**
This usually means you've run out of server capacity. Verify you have room for another server, then re-trigger the order.
**AI credits not refilling**
Make sure your Stripe Connect account is fully connected under **Settings → Stripe Connect** so renewal payments come through. If credits still don't top up after a successful renewal, contact support.
**Agent not responding (Hermes)**
Re-run the install from **VPS → My Instances → Reinstall** — it is safe to re-run and will not wipe customer data.
***
## Related pages
* [AI Experiences overview](/partner-portal/experiences/overview) — all experience types and how to enable them
* [Stripe Connect](/partner-portal/settings/stripe-connect) — connect your Stripe account
* [VPS Servers](/partner-portal/vps/overview) — manage and monitor customer VPS instances
* [AI Gateway](/partner-portal/ai-gateway) — manage API keys and credit budgets
* [Hermes Agent Setup](/agents/hermes-agent-setup) — full deploy + chat API reference
* [Hermes Agent overview](/agents/hermes/overview) — high-level summary and use cases
* [OpenClaw Partner Setup](/agents/openclaw-setup) — manual OpenClaw setup (non-auto-install)
***
## OpenClaw Auto-Install
OpenClaw Auto-Install deploys a personal AI accessible via **Telegram**. Once setup completes, the customer can message their Telegram bot to:
* Read and draft emails via connected Gmail
* Manage Google Calendar (schedule meetings, daily briefings)
* Query and update Notion pages
* And more via the Knotie AI Gateway
The default alias is `/openclaw-autoinstall`. You can change it under **Experience Settings → General**.
### What the customer sees
Landing page hero: *"Your Personal AI. One Click. No Tech Skills Needed."*
After checkout and setup:
* A welcome email arrives with portal login credentials.
* The customer logs in and finds AI Chat enabled in their portal sidebar.
* Their connected apps (Gmail, Calendar, Notion) are listed in the integration panel.
***
## Hermes Auto-Install
Hermes Auto-Install deploys [Nous Research's Hermes](https://hermes-agent.nousresearch.com) — a fully autonomous AI agent — on a **dedicated private VPS**.
Hermes can:
* Browse the live web
* Run shell commands and execute code
* Use tools through the Knotie AI Gateway
* Maintain persistent memory across sessions
The default alias is `/hermes-autoinstall`. You can change it under **Experience Settings → General**.
### What the customer sees
Landing page hero: *"Your Own Autonomous AI. On Your Own Private Server. One Click."*
After checkout and setup:
* A welcome email arrives with portal login credentials.
* The customer logs in and finds AI Chat + Infrastructure dashboard in their portal sidebar.
* They can chat with Hermes directly from the portal — no terminal required.
* The VPS runs Hermes exclusively on dedicated compute (not shared).
For customers who want to interact with Hermes directly over SSH, they can run `hermes chat` in the VPS terminal. Run `hermes doctor` to verify the install health. See [Hermes Agent Setup](/agents/hermes-agent-setup) for the full deploy + chat API reference.
***
## Troubleshooting
**Checkout completes but the customer's portal isn't set up**
Check the order status:
1. In the Partner Portal, open the customer record.
2. Look for a failed or pending auto-install order under their account.
3. If the order is stuck, contact support with the order reference — setup can safely be re-run.
**Server provisioning fails**
This usually means you've run out of server capacity. Verify you have room for another server, then re-trigger the order.
**AI credits not refilling**
Make sure your Stripe Connect account is fully connected under **Settings → Stripe Connect** so renewal payments come through. If credits still don't top up after a successful renewal, contact support.
**Agent not responding (Hermes)**
Re-run the install from **VPS → My Instances → Reinstall** — it is safe to re-run and will not wipe customer data.
***
## Related pages
* [AI Experiences overview](/partner-portal/experiences/overview) — all experience types and how to enable them
* [Stripe Connect](/partner-portal/settings/stripe-connect) — connect your Stripe account
* [VPS Servers](/partner-portal/vps/overview) — manage and monitor customer VPS instances
* [AI Gateway](/partner-portal/ai-gateway) — manage API keys and credit budgets
* [Hermes Agent Setup](/agents/hermes-agent-setup) — full deploy + chat API reference
* [Hermes Agent overview](/agents/hermes/overview) — high-level summary and use cases
* [OpenClaw Partner Setup](/agents/openclaw-setup) — manual OpenClaw setup (non-auto-install)