> ## Documentation Index
> Fetch the complete documentation index at: https://docs.knotie-ai.pro/llms.txt
> Use this file to discover all available pages before exploring further.
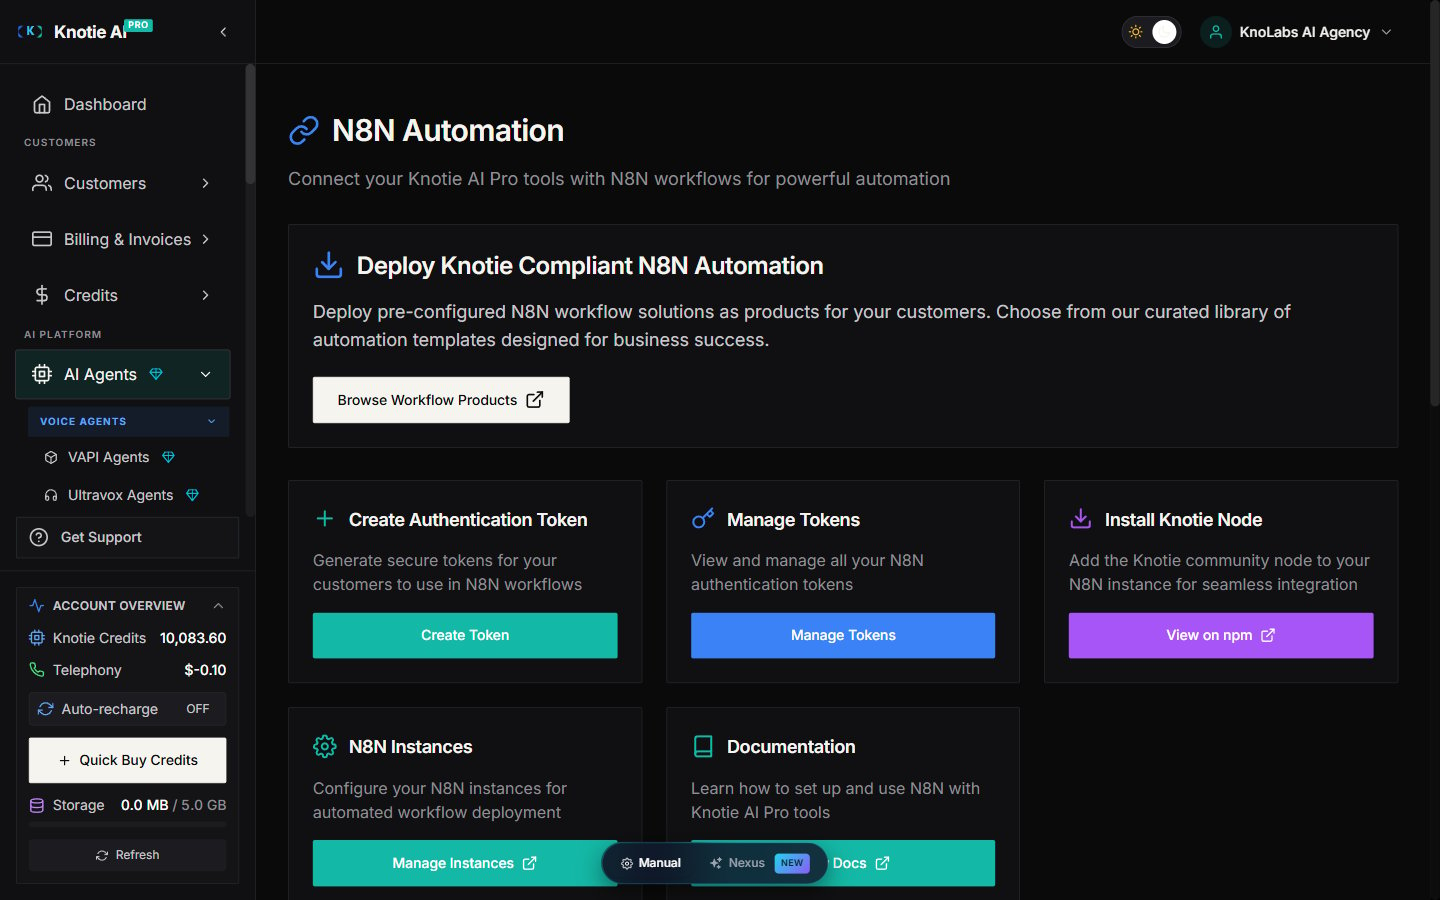
# N8N automation
> Connect Knotie AI Pro tools with N8N workflows using tokens and the Knotie N8N node.
## What N8N Automation is for
N8N Automation connects Knotie AI Pro with N8N so you can build workflows like:
* Lead routing
* Customer follow-ups
* CRM updates
* Automated support flows
## Where to find it
1. Open **AI Agents** (in the main sidebar).
2. Expand the **Automation & Tokens** sub-group.
3. Click **N8N Automation**.
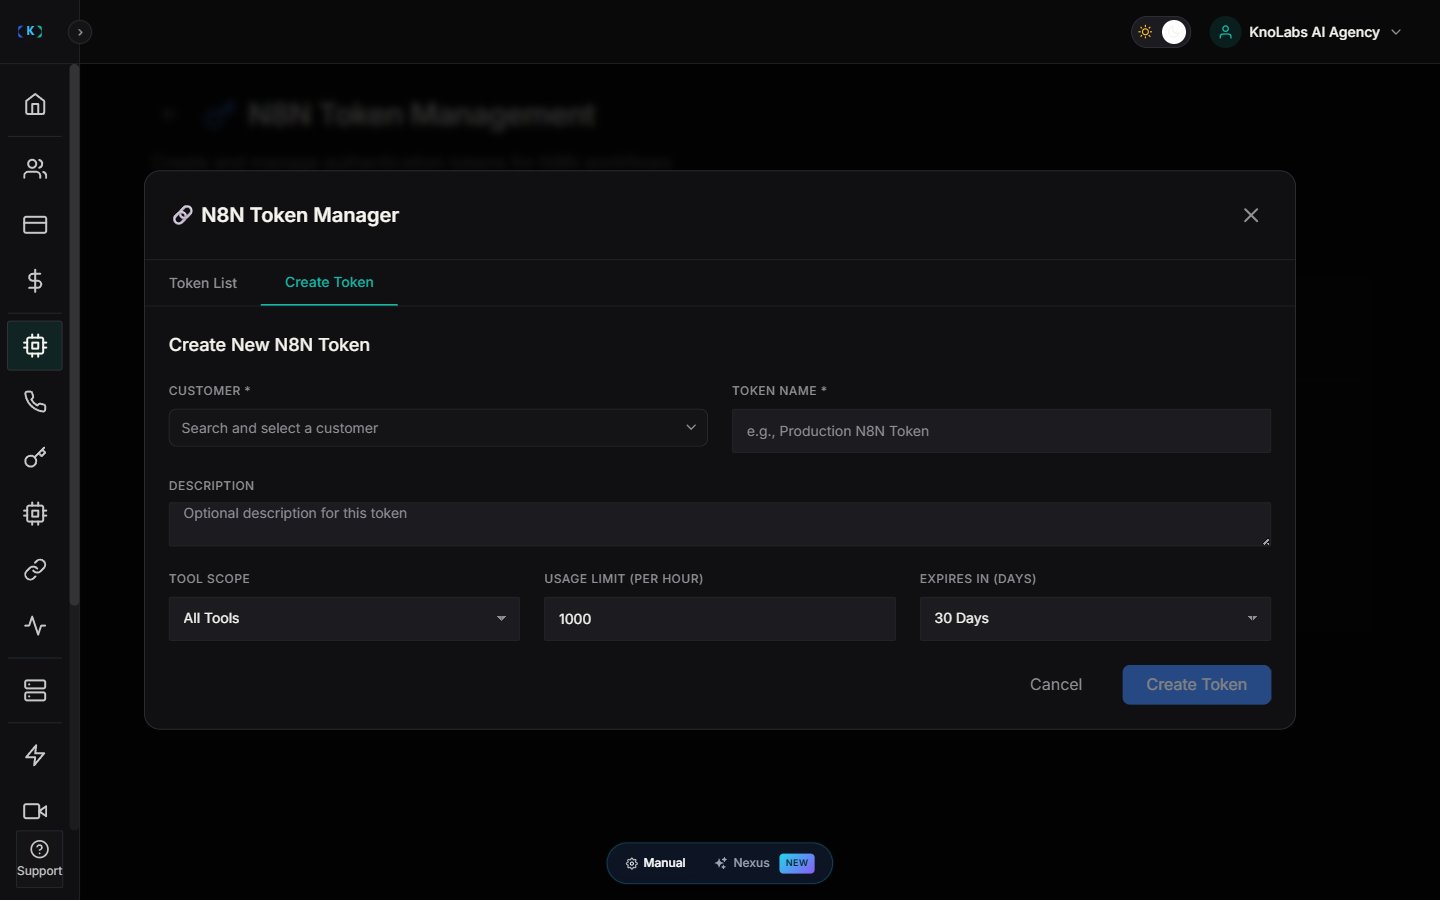
## Create an authentication token
Tokens let you give a customer-scoped connection to N8N.
1. Open **N8N Automation**.
2. Click **Create Token**.
3. Choose the customer.
4. Save.
 ## Manage existing tokens
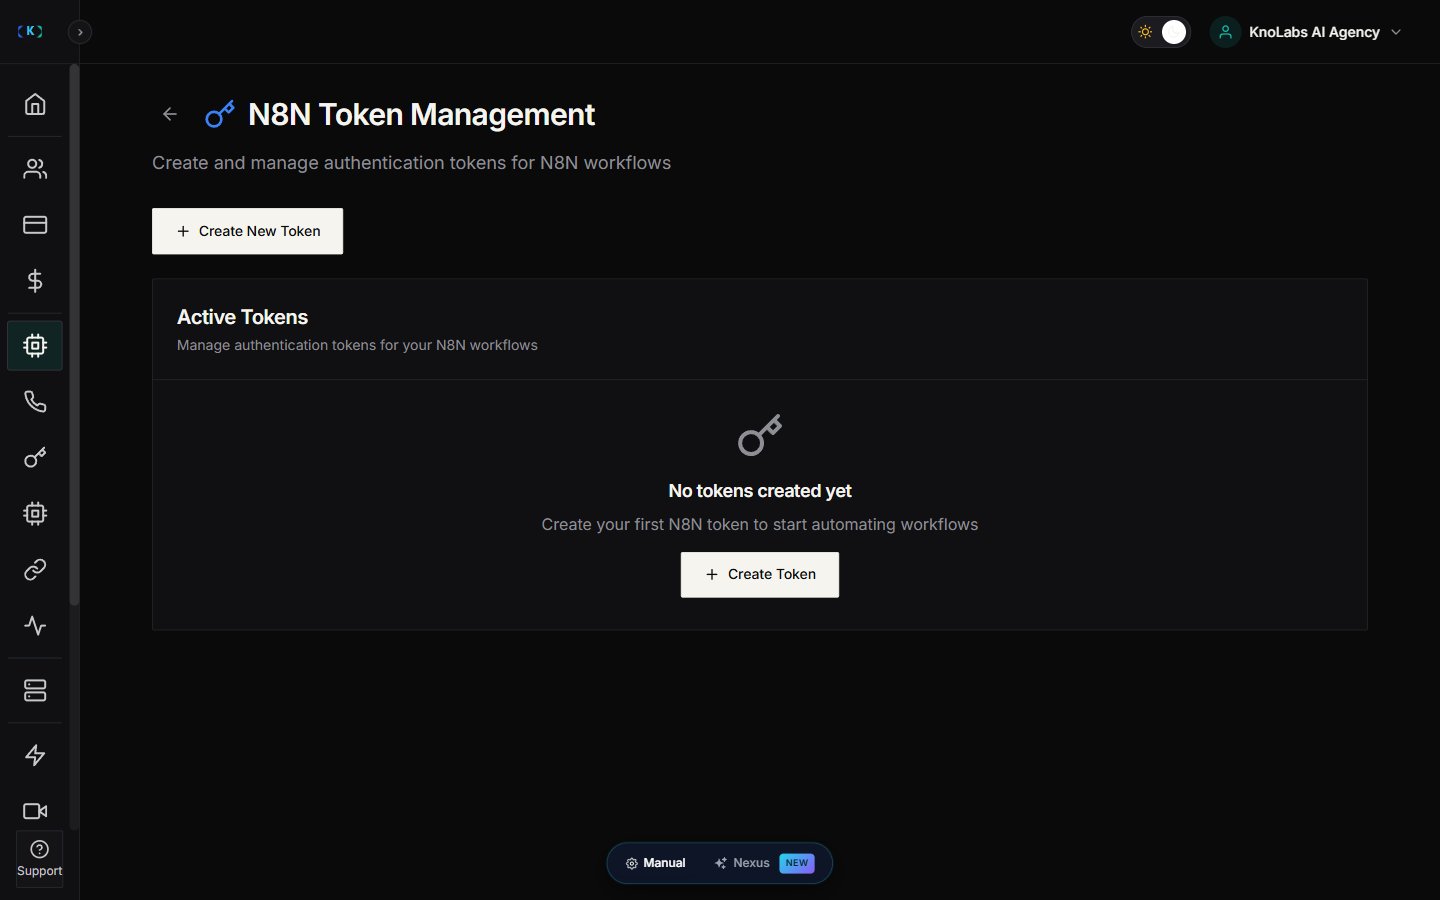
1. From **N8N Automation**, click **Manage Tokens**.
2. Review token scope, expiry, and usage limit.
## Manage existing tokens
1. From **N8N Automation**, click **Manage Tokens**.
2. Review token scope, expiry, and usage limit.
 ## Deploy Workflow Products
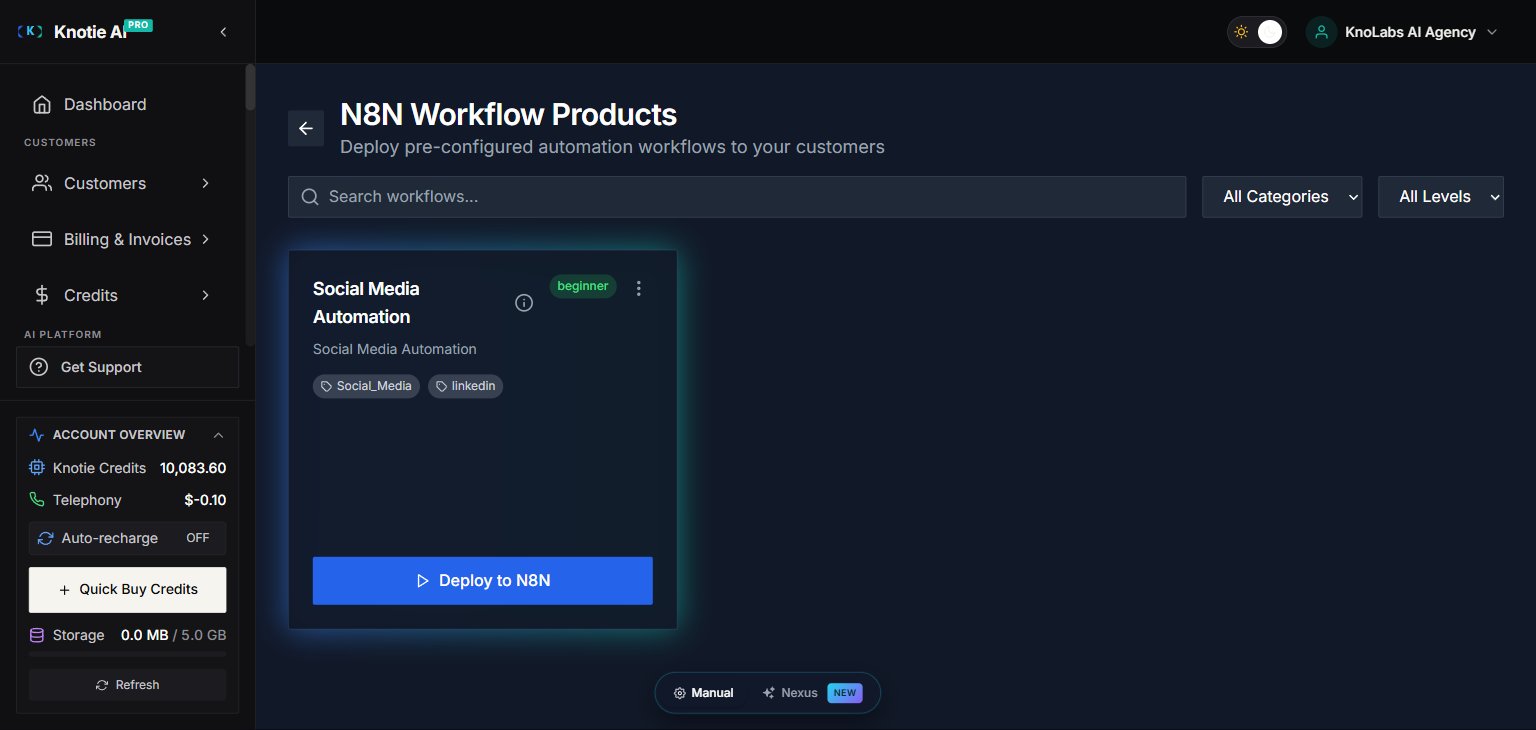
Knotie AI Pro provides pre-configured N8N workflow solutions that you can deploy as products for your customers.
### Browse Workflow Products
1. Go to **AI Agents → N8N Automation**.
2. Click **Browse Workflow Products**.
3. View the curated library of automation templates.
4. Select a workflow product to deploy.
### Deploy a Workflow for a Customer
1. Choose a workflow product from the library.
2. Select the customer to deploy for.
3. Configure any required settings.
4. Click **Deploy**.
The workflow will be automatically configured with the customer's tools and credentials.
## Deploy Workflow Products
Knotie AI Pro provides pre-configured N8N workflow solutions that you can deploy as products for your customers.
### Browse Workflow Products
1. Go to **AI Agents → N8N Automation**.
2. Click **Browse Workflow Products**.
3. View the curated library of automation templates.
4. Select a workflow product to deploy.
### Deploy a Workflow for a Customer
1. Choose a workflow product from the library.
2. Select the customer to deploy for.
3. Configure any required settings.
4. Click **Deploy**.
The workflow will be automatically configured with the customer's tools and credentials.
 ## Install the Knotie node in N8N
The Knotie community node allows N8N workflows to interact with Knotie AI Pro tools.
### Installation
1. Open your N8N instance.
2. Go to **Settings → Community Nodes**.
3. Search for `n8n-nodes-knotie`.
4. Click **Install**.
### Configure Credentials
After installing the node:
1. Create a new N8N workflow.
2. Add the **Knotie** node.
3. Click **Create New Credentials**.
4. Enter your N8N token (from Knotie AI Pro).
5. Save the credentials.
### Available Operations
The Knotie node supports:
* **Send SMS** – Send SMS notifications
* **Send Email** – Send email notifications
* **Make Call** – Trigger outbound calls
* **Get Call Details** – Retrieve call information
* **Update Customer** – Modify customer data
* **Create Lead** – Add new leads
## N8N Instances Management
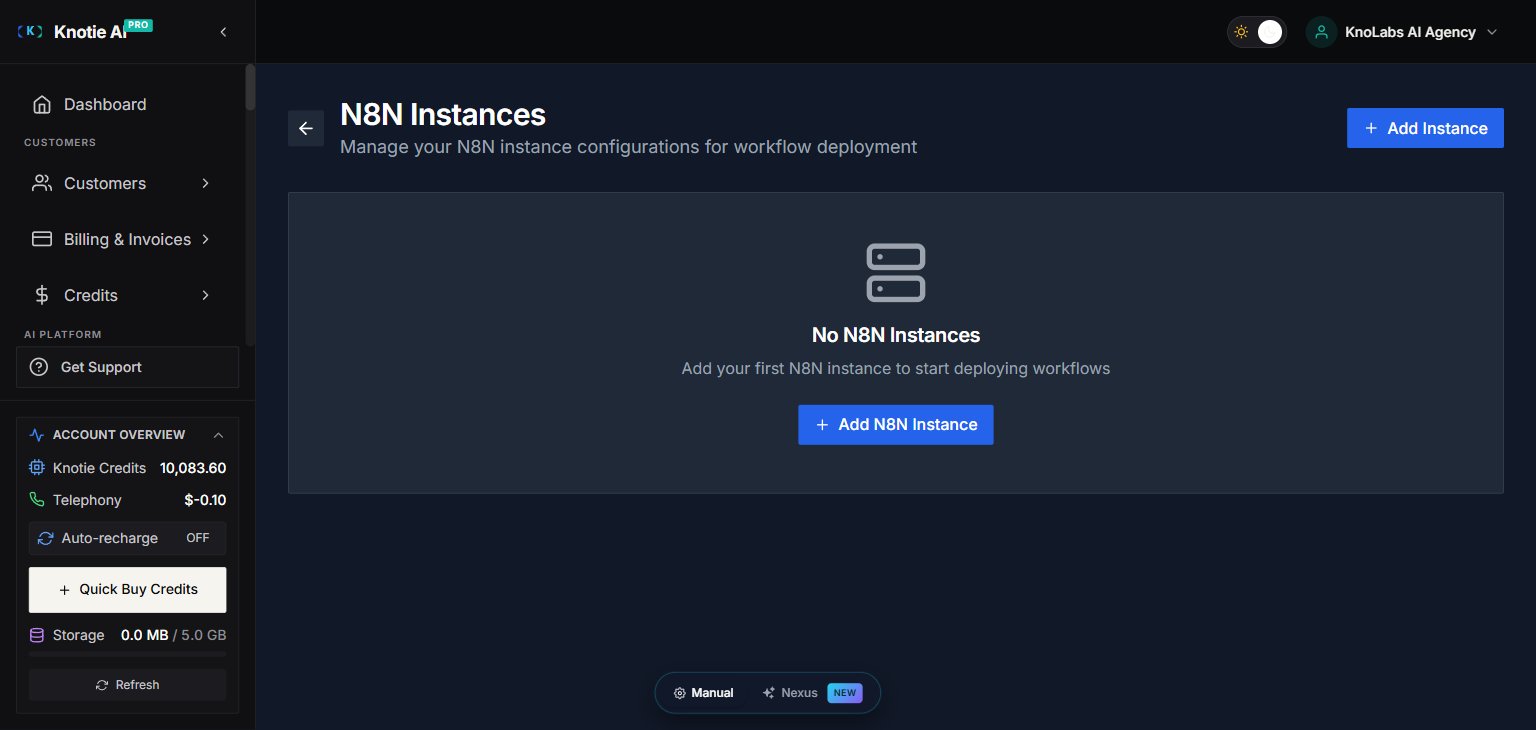
Manage N8N instances connected to your Knotie AI Pro account.
### Add an N8N Instance
1. Go to **AI Agents → N8N Automation**.
2. Click **Manage Instances**.
3. Click **Add Instance**.
4. Enter:
* Instance URL
* Instance name
* API credentials
5. Save.
### Monitor Instance Status
View the status of connected N8N instances:
* **Active** – Instance is running and connected
* **Inactive** – Instance is not responding
* **Error** – Connection or authentication issues
## Install the Knotie node in N8N
The Knotie community node allows N8N workflows to interact with Knotie AI Pro tools.
### Installation
1. Open your N8N instance.
2. Go to **Settings → Community Nodes**.
3. Search for `n8n-nodes-knotie`.
4. Click **Install**.
### Configure Credentials
After installing the node:
1. Create a new N8N workflow.
2. Add the **Knotie** node.
3. Click **Create New Credentials**.
4. Enter your N8N token (from Knotie AI Pro).
5. Save the credentials.
### Available Operations
The Knotie node supports:
* **Send SMS** – Send SMS notifications
* **Send Email** – Send email notifications
* **Make Call** – Trigger outbound calls
* **Get Call Details** – Retrieve call information
* **Update Customer** – Modify customer data
* **Create Lead** – Add new leads
## N8N Instances Management
Manage N8N instances connected to your Knotie AI Pro account.
### Add an N8N Instance
1. Go to **AI Agents → N8N Automation**.
2. Click **Manage Instances**.
3. Click **Add Instance**.
4. Enter:
* Instance URL
* Instance name
* API credentials
5. Save.
### Monitor Instance Status
View the status of connected N8N instances:
* **Active** – Instance is running and connected
* **Inactive** – Instance is not responding
* **Error** – Connection or authentication issues
 ## Getting started checklist
1. Install the Knotie node in your N8N instance.
2. Create a token for a customer.
3. Configure credentials in N8N.
4. Run a test workflow.
5. (Optional) Deploy pre-built workflow products.
## Best practices
* **Scope tokens appropriately** – Only grant access to the tools needed for each workflow.
* **Set expiry dates** – Use short-lived tokens for testing, longer for production.
* **Monitor usage** – Check token usage limits to avoid hitting rate limits.
* **Use workflow products** – Start with pre-built templates before creating custom workflows.
## Troubleshooting
* **Token authentication failed** – Verify the token hasn't expired and has the correct scope.
* **N8N node not found** – Ensure the community node is installed in your N8N instance.
* **Workflow product deployment failed** – Check customer has required integrations enabled.
## Screenshots
## Getting started checklist
1. Install the Knotie node in your N8N instance.
2. Create a token for a customer.
3. Configure credentials in N8N.
4. Run a test workflow.
5. (Optional) Deploy pre-built workflow products.
## Best practices
* **Scope tokens appropriately** – Only grant access to the tools needed for each workflow.
* **Set expiry dates** – Use short-lived tokens for testing, longer for production.
* **Monitor usage** – Check token usage limits to avoid hitting rate limits.
* **Use workflow products** – Start with pre-built templates before creating custom workflows.
## Troubleshooting
* **Token authentication failed** – Verify the token hasn't expired and has the correct scope.
* **N8N node not found** – Ensure the community node is installed in your N8N instance.
* **Workflow product deployment failed** – Check customer has required integrations enabled.
## Screenshots